Tag Archives: crafting

Dare to DIY: Give Homemade

I’m reaching back into the “archives” for this week’s Dare to DIY: give homemade challenge.

Over the summer, I pinned this jewelry DIY from the Martha Stewart blog as a way to keep myself occupied during our 12+ hour drive to Florida. I made two necklaces, and nearly lost all of the wooden beads in the car when we made a sudden stop.

All you need is some plastic lanyard lacing (remember all those summer camp crafts??) and beads. You could probably use silk cord or ribbon, and other types of beads. I just went off of the instructions on the MS blog.

www.twopurplecouches.wordpress.com

I ended up improvising a bit when I had trouble looping the two strands back through the lacing.


www.twopurplecouches.wordpress.com

www.twopurplecouches.wordpress.com

I had fun playing with the color combos and dreaming up outfits that my new neon necklaces would go with.

Check out the Dare to DIY hostesses: Two Twenty OneDecor and the DogMaybe Matilda, and Newly Woodwards. And check out more handmade gift ideas here!

Fall Pinterest Challenge: Holiday Ornament Wreath

When Sherry at Young House Love. issued the Fall Pinterest Challenge last Tuesday, I eagerly accepted… Annnnd then later that day I found myself in the acrylic paint aisle at Michaels, completely overwhelmed and unable to decide which Pinterest project I should finally take on. Ack. Cue crafting meltdown.

After recovering, thanks to the help of some Panera mac ‘n cheese, I thought it’d be smart to get a head-start on some Christmas crafts, since that’s what I’ve been pinning a lot of lately.

Ornament Wreath Collage

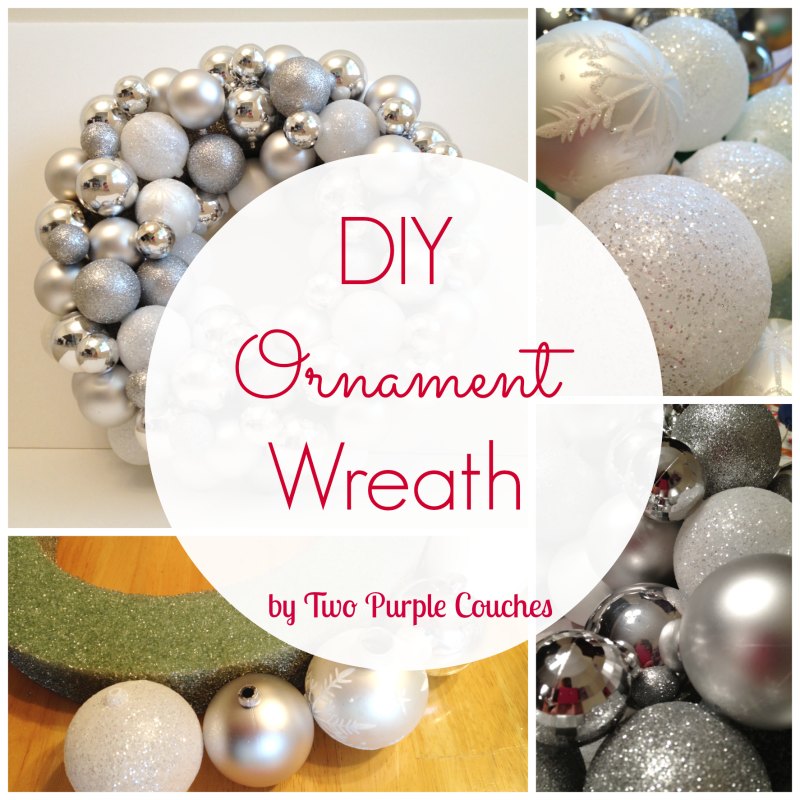
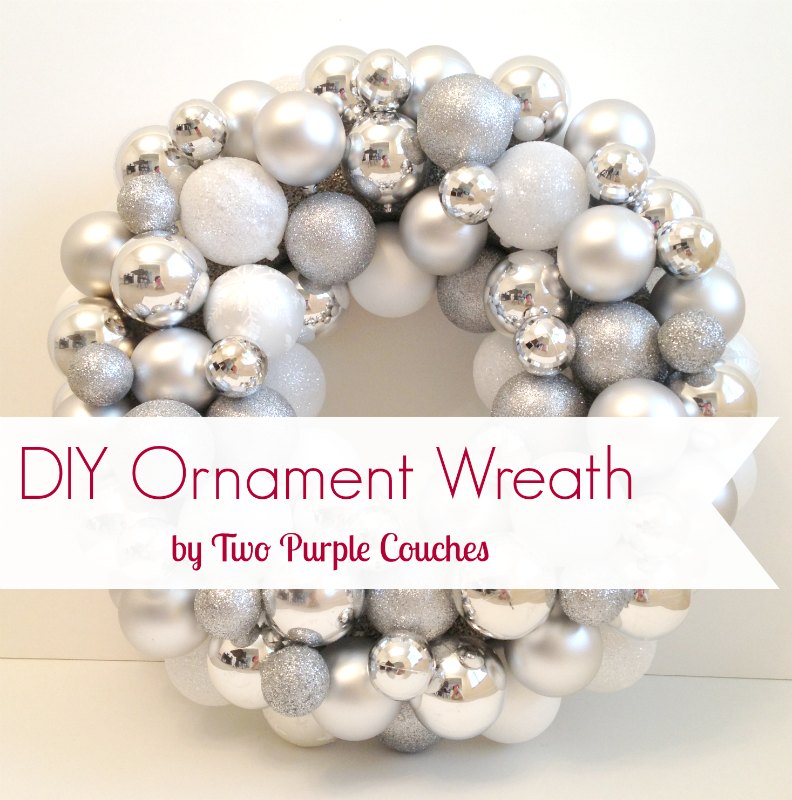
The winner? An Ornament Wreath. The inspiration? This one, and this one.

Except mine would be all in silvers and whites to fit into the sparkly scheme I’m dreaming up for our mantle/family room this Christmas.

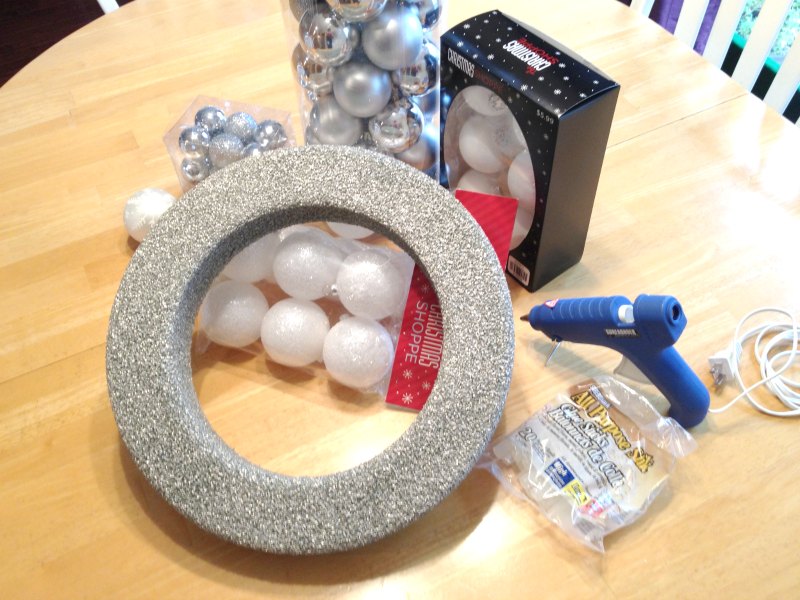
After reading up on some other bloggers’ tutorials to gauge how many ornaments I’d need (answer: a ton), I shopped around hoping to find some all-silver sets including small, medium and large sizes. I couldn’t find exactly what I wanted, but Hobby Lobby had the next best thing – a set of 50 medium ornaments in various silvers for $19.99 plus 40% off! They also had color-coordinated sets of smaller ornaments.

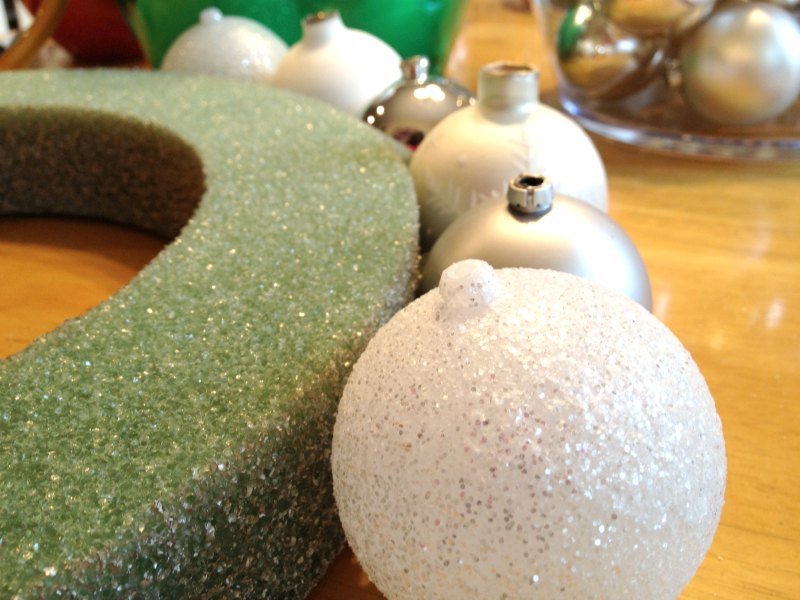
I pretty much followed the instructions from Deep Fried Kudzu, starting with spray-painting a 14″ foam wreath so that the green parts wouldn’t show through. I used Krylon Brushed Metallics Satin Finish in Nickel.

ornament wreath supplies - Two Purple Couches

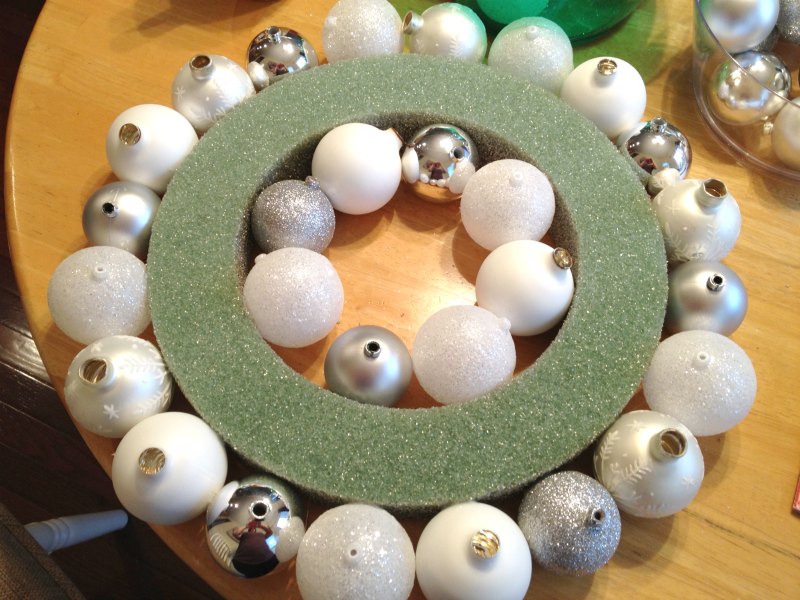
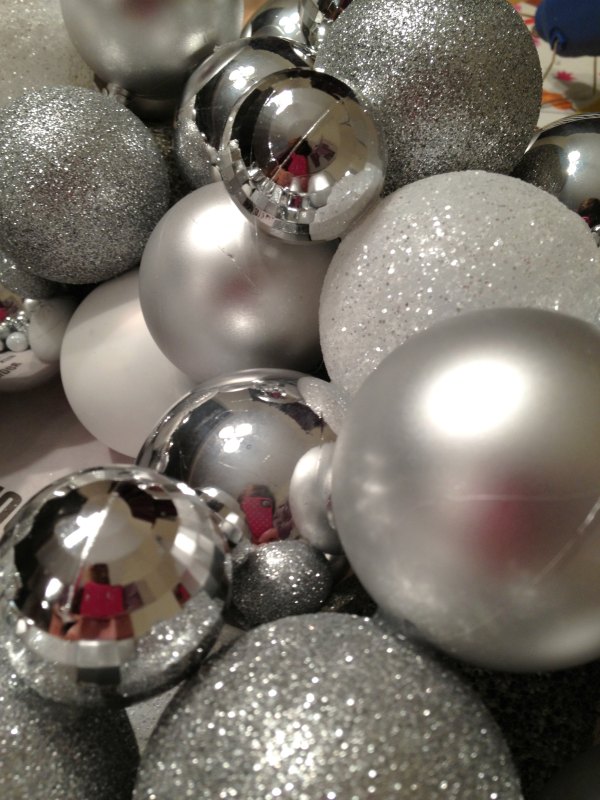
Once dry, I flipped the wreath over so the back of it would face me while I worked. I removed all of the ornament caps, then started gluing the largest ones around the outer edge of the wreath, just like so:

ornament wreath progress - Two Purple Couches

I was relieved when the ornaments were nearly-perfectly spaced around the outer edge! Yesss! I didn’t even count that out in advance!

Then I did the inner circle. I decided to use up some remaining large ornaments, with a few mediums throw in for good measure.

Ornament wreath rows - Two Purple Couches

I waited a bit until everything seemed dry and secure. Then I flipped the wreath over and plotted out a “pattern” of medium and small ornaments. Here’s why my photo-taking fell apart. Sorry. I was in the Glue Zone.

So, here’s the finished product. Ta-da!

ornament wreath - Two Purple Couches

Not gonna lie, I’m pretty pleased with myself for completing a Christmas craft before November! I am never this on-the-ball! And before you ask, no, I do not have any gift-shopping completed yet. Priorities, people!

ornaments

Come back in December to see how my Sparkly Winter Wonderland theme pans out. This wreath will surely be taking center-stage.

And now, a few stats to round out this post:

Total Number of Ornaments Used – about 100! Broken down by size: 27 small, 50 medium, and 24 large. I think it was enough. Honestly, you could probably keep gluing ornaments to each other until the cows come home!

Total Number of Glue-Gun Burns – only 1!

Total Project Cost – about $35

DIY Ornament Wreath - Holiday Wreath - Two Purple Couches

You can find my Pinterest Holiday Decor board here, or all of my Pinterest boards here.

Thanks for reading! Now go check out the other great projects from the Fall Pinterest Challenge Hostesses!

Sherry @ Young House Love / Sarah @ Ugly Duckling House / Katie @ BowerPower / Carmel @ Our Fifth House

I’m already getting ideas together for the Winter Challenge 😉

I’m also sharing this DIY at:
The Shabby Nest

Home for the Holidays 2012

Autumn Wreath & Front Porch Reveal

I finally had some free time this weekend to put together a new seasonal wreath (doesn’t everyone craft at 10pm on a Saturday night??)…

I purchased a grapevine wreath and fall floral stems from Michaels. I used a roll of burlap that I had leftover from my Spring Wreath project.

I started by wrapping the burlap around the wreath. Then I trimmed the long stems and arranged the flowers before I hot-glued them down to keep them in place (half of my Christmas wreath wound up in our side yard last year due to wind and a lack of more permanent security measures).

And ta-da! A wreath is born!

And now the whole front porch is decked out for Fall, with some mums lining the steps and a new wreath on the door. Still need some pumpkins and squash to finish things off, but it’s definitely starting to look like Fall around the Kennedy house 🙂

Autumn Subway Canvas

When it comes to seasonal decor, I tend to stick to Winter/Christmas. And by “stick to” I mean Make It Look Like Santa’s Workshop / A Wintery Wonderland Exploded In My House. I. Love. Christmas Decor.

But, I have to admit that I’ve recently had a hankering for some Fall-inspired touches around the house. In the past, I think I’ve been turned off by the predominantly brownish color palette of Fall decor, but with the recent metallics trend… now that’s a seasonal bandwagon I can get on! Whoo! Whoo! (wait, sorry, that’s a train sound. What sound does a bandwagon make?)

Anywho, I came across this seasonal Subway art on Pinterest…

from Antsi-Pants blog

and decided this was totally something I could decorate around. She’s even got glittery pumpkins right next to it! Yessss!

This is actually a printable that can be downloaded (for free!), but I had a Craft Itch that needed to be scratched. I decided with some paint and scrapbooking accessories, this could easily become a personalized piece. So I made a trip to Michael’s, picked up some supplies, and got to work!

I picked up an 11″ x 14″ canvas and figured I’d need at least eight words/phrases to cover it. I made a list of all of the Autumn-related words I could think of, then narrowed down to the ones that best represent what I love about the season.

I wanted a variety of fonts, so I purchased stencils and 3D sticker letters. I also decided to free-hand some of the words, which I saved for last so that I could fill in remaining spaces as needed. I started with the stencils, tracing them lightly with a pencil.

Then I added the 3D sticker letters, free-handed in the remaining spaces, and added a few “accessories” in the form of the sunflower, pumpkin and leaf stickers. Just to add some extra pizzazz!

I’m surprisingly pleased with how it turned out! And how relatively easy it was to do! A little bit more time consuming (took me about 2-2.5 hours from start to finish), but fun and worth it.
I already have plans for a Christmas one 😉

It hasn’t found a permanent home yet, but I have a few other Fall ideas in my mind that I’m hoping to pull together this weekend!

Where do you stand on seasonal decor?

Update: found this fun Fall Decorating Link Party from The Lettered Cottage! Check out all of the other bloggers’ awesome fall decor ideas!

The Lettered Cottage