This article was originally published in the July 2015 Issue of VRAI Magazine.
Ever since I moved out of my parents’ house, I’ve been working on cultivating a green thumb. I grew up watching my dad’s gardens thrive—from banks of carefully-tended rose bushes to vegetable beds full of juicy tomatoes—and each spring I look forward to getting my hands back in the dirt.
One of my favorite ways to garden is container gardening, which came in very handy when my husband and I lived in a 3rd floor condo unit for a few years after getting married. I love the versatility of container gardening, and I also love the DIY opportunities that come along with it. Because let’s face it, fancy planters are expensive! But with a few bottles of paint and affordable terra cotta pots, you can DIY your containers any way you like!
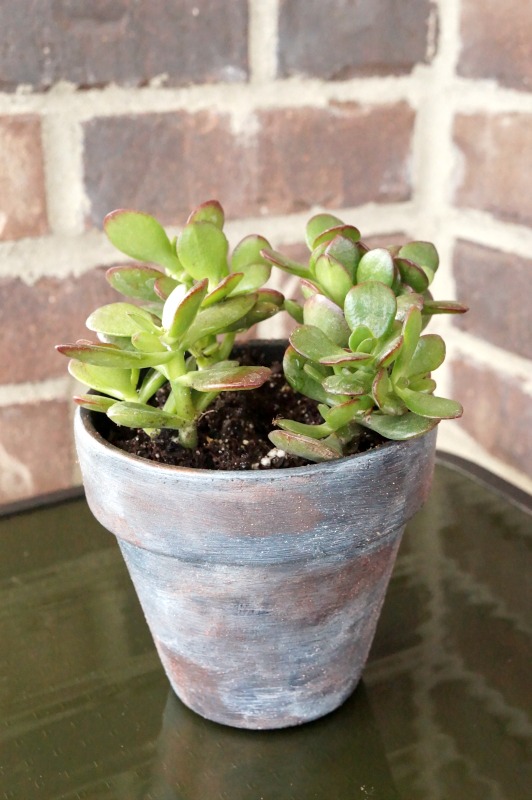
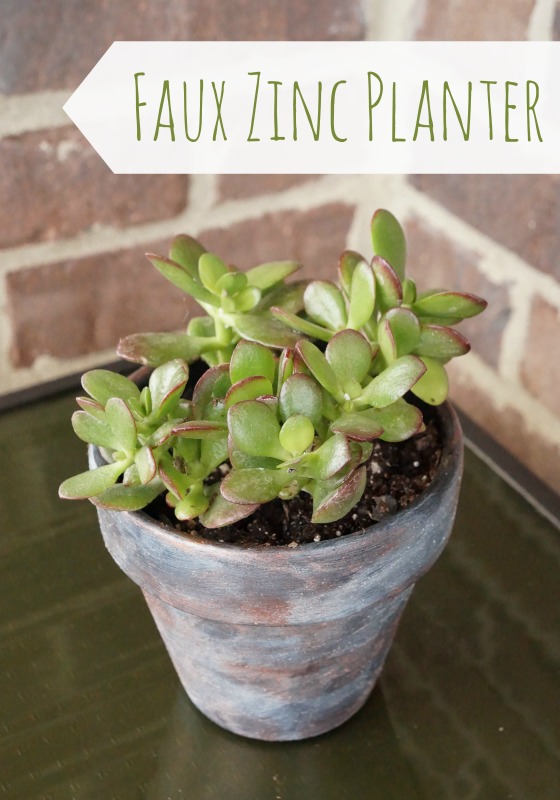
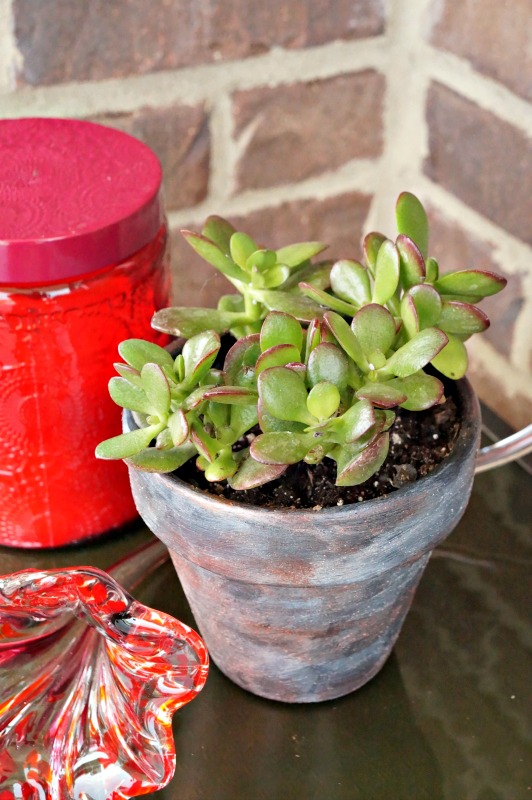
I particularly love the look of these faux zinc planters. It feels a bit vintage and a bit industrial. I layered several different paints to achieve this look.
Let me walk you through how I did it.
What you’ll need:
- terra cotta planter
- spray primer
- craft paint in black, silver or gray and brown or bronze. I’d suggest using Patio Paint or other paint formulated specifically for outdoor use.
- paint brushes and/or spouncers
How to paint a faux zinc technique:
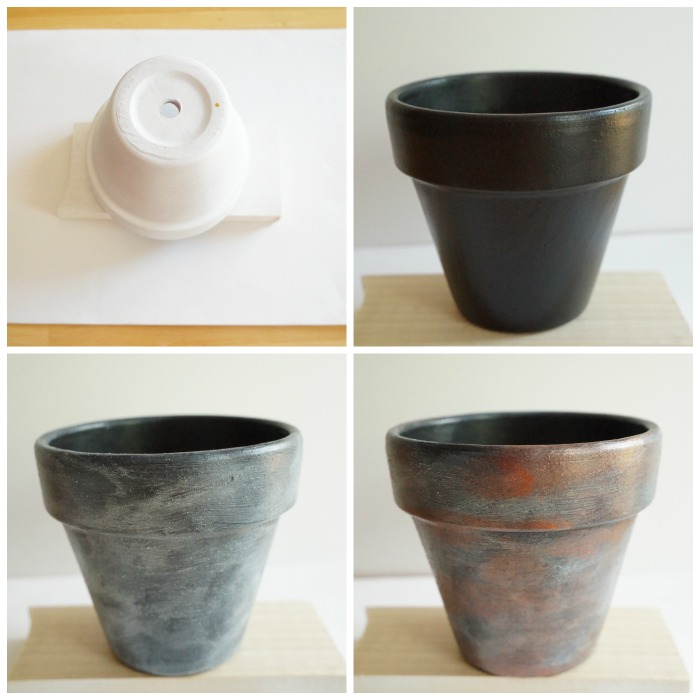
- Start by giving your pot a nice coat of primer. Terra cotta really absorbs paint, so the primer will give you a good base to start.
- Once the primer is dry, paint your entire pot with 1-2 coats of black craft paint.
- When this layer is dry to the touch, lightly brush on the silver paint. I used a dry-brush technique, which means I dipped my brush in paint, then dabbed most of it off onto a paper towel and started to lightly swipe my brush back and forth across the pot, working in small sections. If I got heavy-handed in my paint application, I used the paper towel to wipe off some excess. The silver paint also had some texture to it, which added a nice detail.
- When the silver paint was dry, I used a small foam spouncer and paper towel to very lightly dab-on-and-wipe=off a bit of bronze metallic paint. You could skip this step if you like, but I wanted to add a bit more depth of color to my faux zinc planter.
- Once dry, my planter was ready for a few miniature succulents.
I am very pleased with how this planter turned out—the faux zinc finish really looks like metal, and the texture of the silver paint is a nice detail. I’d love to try this technique on some larger planters. I think they’d make a nice “statement piece” for any front porch or patio this summer!
I love this!!
Amy Dowling recently posted…Fresh Blackberry Cocktail
Thank you Amy!!
Pingback: DIY Planter Ideas for the Home | MM #151 | The Kolb Corner