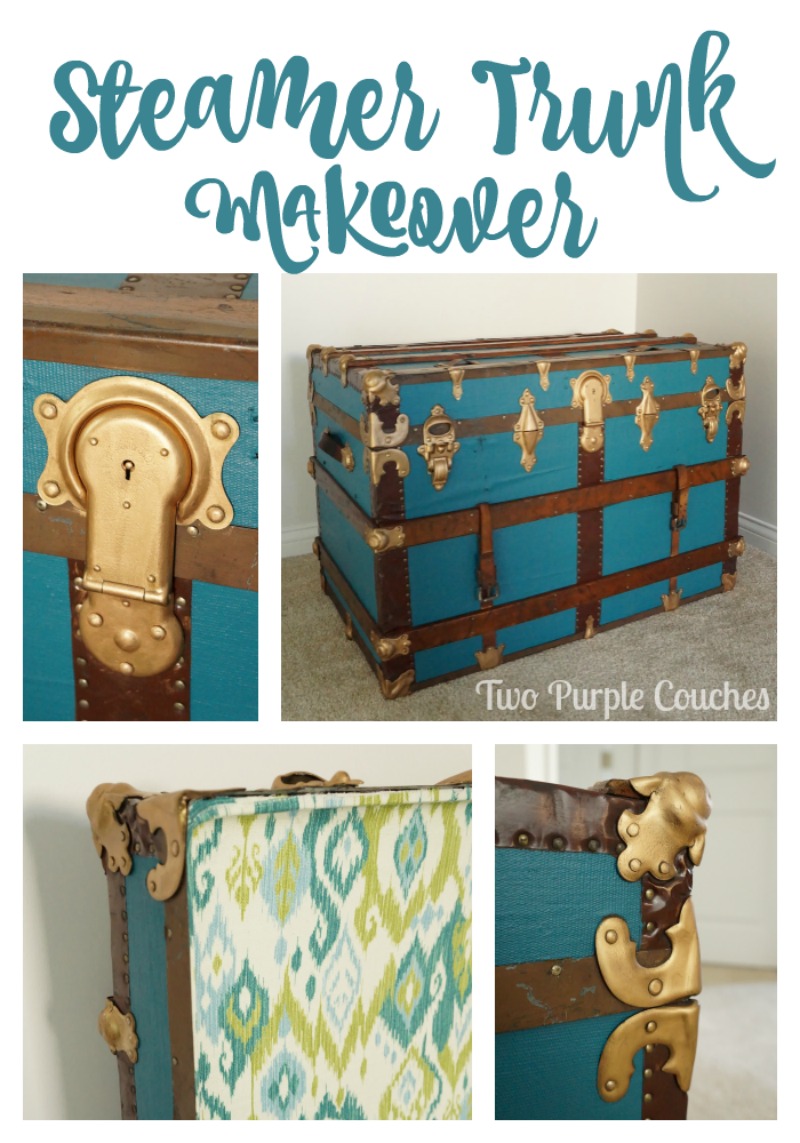
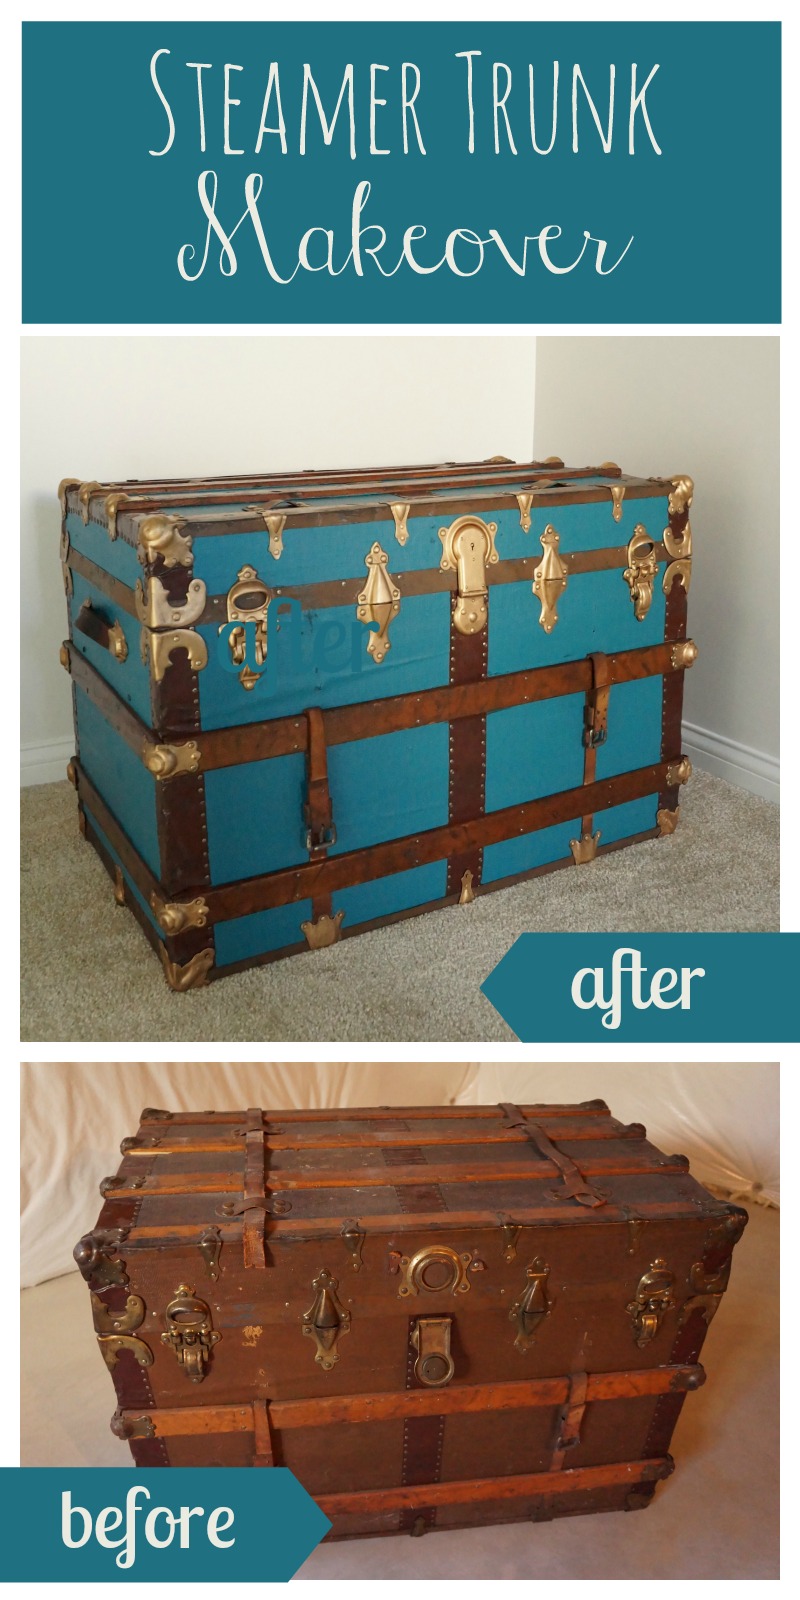
Back in September, I began my biggest DIY project to-date. This by far outweighs our previous crown moulding projects and window trimming work. This project was full of curveballs, starts and stops, second guesses, and even some bouts of self-doubt. But I pressed on and powered through, and today I’m sharing the before-and-after of my first big DIY triumph – this antique steamer trunk makeover.
I remember helping my parents clean out my grandma’s house after she passed away in the summer of 1998. I remember packing up her artwork and dishware. I even remember that I put a staple through one of my fingers that day. But I don’t remember loading this old steamer trunk into the car. Some way, some how, it came to live alongside the stairs in my parents’ basement. When they moved a few years ago, it came to live in our basement. And I knew that someday, I would do something with that trunk. And that someday has finally come around!
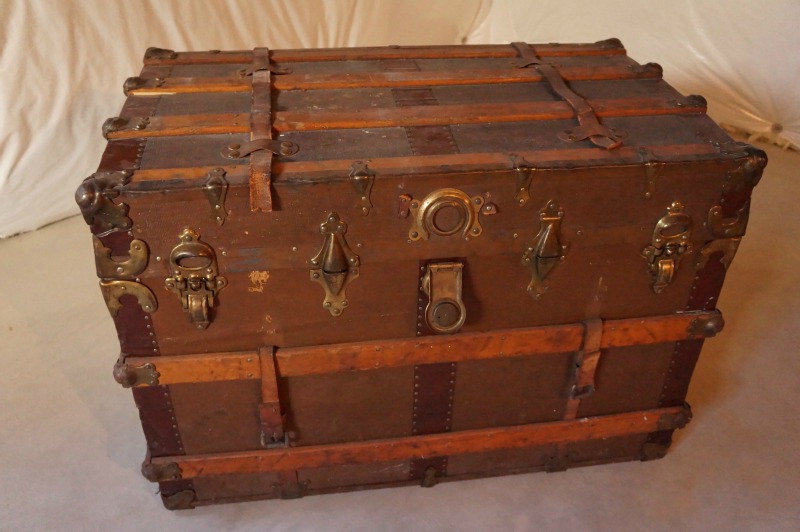
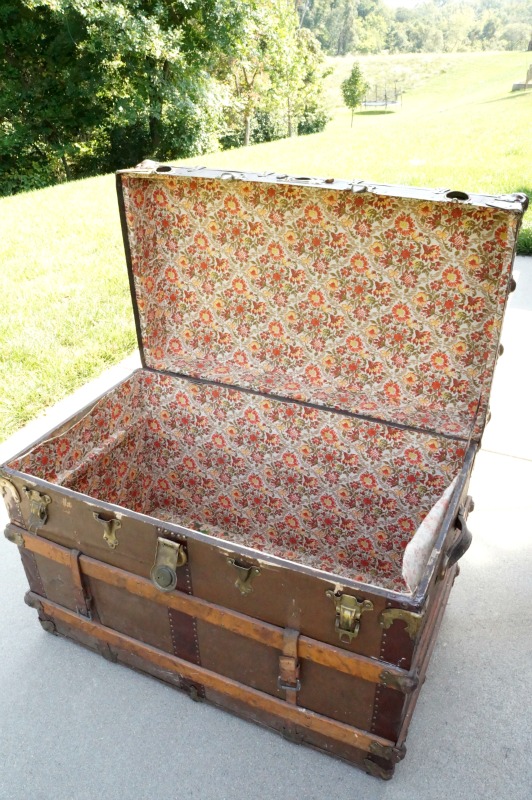
And lemme tell you, this poor beat-up steamer trunk needed a lot of somethings done. The exterior was scratched and dirty; the hardware was rusty, the wood slats full of gouges and scratches. And on the inside? Well, let’s just say it’s been hanging onto the smell of Grandma’s basement, with a 1970s-era fabric liner to boot.
So, yeah. It needed work.
This post contains some affiliate links for your convenience. Click here to read my full disclosure policy.
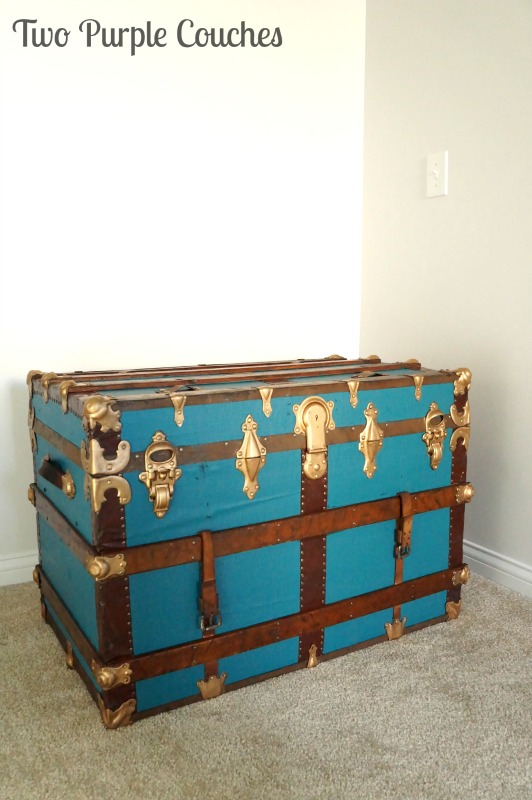
After a thorough cleaning, the wood got a sanding and a fresh coat of Minwax Wood Finish, the original leather handles were oiled, the hardware was brought back to life with Rub ‘n Buff in Antique Gold, and the ugly brown canvas got a major splash of color in the form of RePurpose Paint in Mohair Blue.
Click here to read a detailed tutorial on how to paint a vintage trunk.
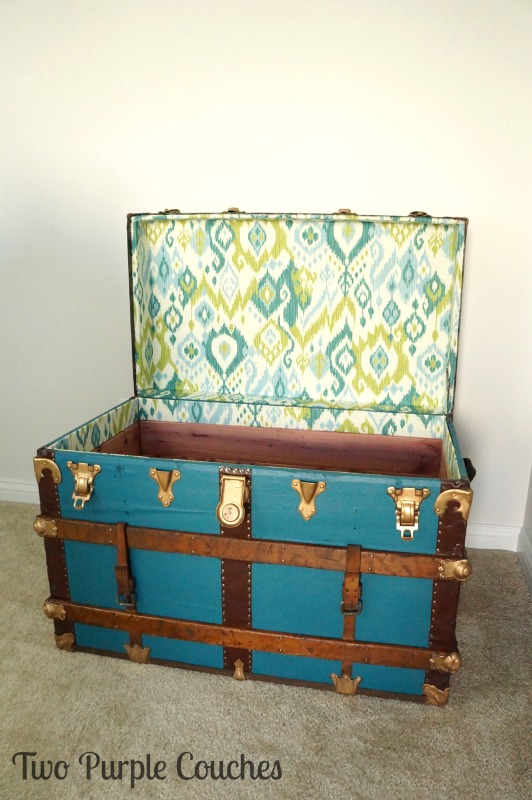
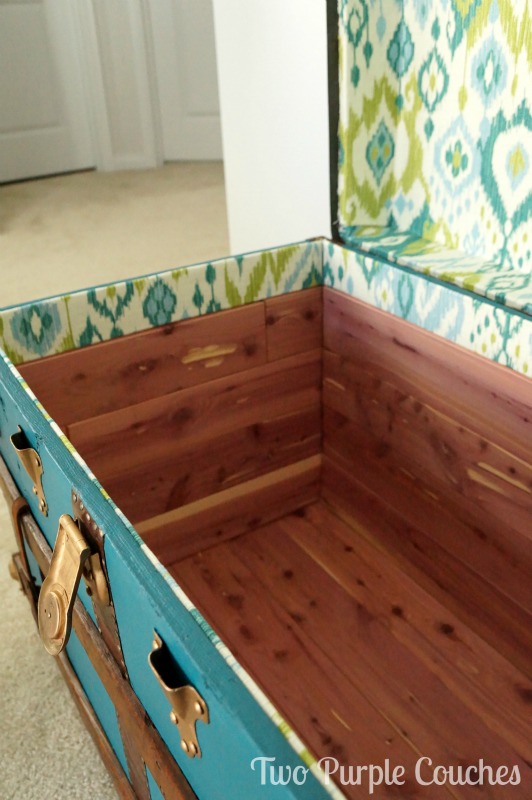
Moving to the interior, I lined the bottom and sides with cedar planks from CedarSafe, which smell incredible and have completely banished the musty-ness. Click here to learn how to build the cedar trunk liner.
After some debate, I decided to use fabric on the lid interior. I chose this bold teal and green ikat print that I bought several years ago. Click here to learn how to make a no sew fabric lining for a trunk.
And I’m going to share all of these how-to’s with you! But today, let’s just admire the transformation.
This poor trunk seems to be without a story. Dad doesn’t know how it came to be in Grandma’s house, but he’s positive it wasn’t hers. She was one of ten siblings, so it could have come from someone in the family. We don’t know who lined the interior with the 1970’s fabric, but my guess is my Grandma, as she had a bit of a DIY streak. (see, it runs in the family!)
As I ripped out the old fabric and cleared away the layers of dirt, I was hoping to find some clues about the history, travels or former owner of this trunk, but the only information I can find is the manufacturer of the hardware, The Corbin Bros Co., which is engraved into the main lock on the front. Based on some internet searching, my best guess is that this trunk is at least 100 years old. The romantic in me likes to think it dates into the 1800s.
I know some people will probably say I should have left the trunk in its original condition. Because history and all. And I get that, I really do. But I want to use and love this piece in our home. The original condition was awful. And smelly. (plus that 1970s fabric—not a fan!). This trunk wasn’t serving any purpose in our basement. But now it’s the perfect place to stash blankets, sheets, even off-season throw pillows. And I’d much rather be putting this piece to use than having it slowly rot away in the basement.
I’ll be sharing all of the how-to details in a series of posts throughout this week and next. There was a lot of trial and error with this project, but it was all worth it!
Sharing with: Work It Wednesday / Shabbilicious Friday / Live Laugh Linky
Want to see more vintage trunk makeover goodness? Check out these posts:


Ooo I couldn’t wait to see this! It looks amazing. Love love love
Amy Dowling recently posted…Perfect Care Package for a Breast Cancer Patient
Aww, thank you so much, Amy!
Pinned. Beautiful job!!! I love it. Hope you are having a great week. Linda @Crafts a la mode
Thank you so much, Linda! I hope you have a wonderful weekend 🙂
Incredible! A LOT of heart & soul went into that makeover! Love the fabric and color you used! Bravo!
Thank you so much, Amy! This means a lot coming from you – you always breathe such amazing new life into your furniture pieces!
What a gorgeous makeover. I have this gorgeous trunk in my basement dying for some love. I wish I could make it into a coffee table but it has a rounded top. I am stumped with what to do with it until I move into a larger space. Definitely pinning for later!
Michelle from Weekend Craft recently posted…Creative Spark Link Party #78
Thank you, Michelle! I may make this one into a coffee table at some point, but for right now, I’m loving the extra storage! I can’t wait to see what you do with yours someday!
I just picked up the same trunk a few days ago and am in the process of restoring it. We’re you able to just clean all the hardware on yours or did you have to remove it? Mine is rusty, tarnished and has quite a bit of the leather strap missing, but I love your makeover.
Also mine has a small metal tag on the lid that says Hess Bros. Allentown, PA.
Thanks Katherine! What a cool find! I left all of the hardware on my trunk – I was afraid of damaging it if I tried to remove it. I used a bristle brush and warm water to try to clean up the hardware but mine was pretty rusty and dirty, too. I tried some brass polish on it, though it didn’t seem to cut through the grime all that well. I ended up using Rub ‘n Buff on all of the hardware; it went on easily and the end result is beautiful. Good luck with your restoration! I bet it will look incredible when you’re finished!
I’m glad I found your post on Pinterest as I just painted the baby brother of your trunk with agave blue/green chalk paint, and have been feeling so guilty! You’ve done a beautiful job and I feel redeemed from feeling like I ruined a good antique! I tried 3 different colors from turquoise to gray and finally settled on the medium shade. I found it in the TRASH with the original paper lining, so I was able to clean the smell away and paint it with polyacrylic to seal and preserve the paper. The canvas outer cover was pretty beat up and super dark, but like you, I love the wood slats to be unpainted. Most of the leather strapping is gone, but the front straps with the buckets are intact. I was going to leave the hardware with the dark patina, but I like how the gold makes yours pop. It’s only 16 inches high, so I’m now trying to decide what kind of “feet” to give it to make it coffee table height. My brother gave me a big one just like yours, so I’ll be coming back to review your techniques again when I fix that one up. Thanks for sharing and helping me!
Andi, I’m so glad you rescued a trunk from the trash! And how awesome that it had the original paper lining! Mine was long gone. It sounds like you did a beautiful job with your makeover – the agave color sounds gorgeous! Thank you so much for your comment – I know I went a bit bold on this makeover, but it reflects my style so much better than if I’d left it in it’s original (and sad) state.
Pingback: Chalk Paint Side Table Makeover - C'mon Get Crafty
How did you shine the hardware on your trunk? It’s beautiful.
Second, I just bought one that has canvas on the outside.
My husband thinks it was used in the military. I plan to line it with fabric!! Can’t find wallpaper very easy anymore. And the idea of kilz before fabric is a great idea. Thank you.
Thank you so much! Good luck with your trunk makeover! Isn’t it so fun to bring these pieces back to life?
I used Rub ‘n Buff Wax in Antique Gold on all the trunk hardware to shine it up.