After our adventures last year installing crown in our dining room, entryway, and family room, Tom & I (well, mostly Tom, since he did 99% of the work) picked up a few tips. If you’re thinking about installing crown, or really, any kind of wall moulding or trim, we hope some (or all!) of these tips might be helpful.
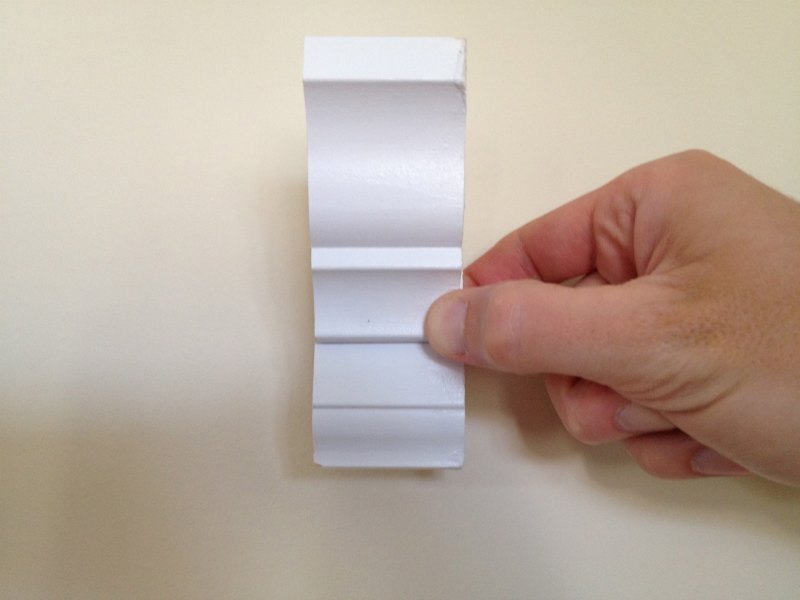
1. Pair Pieces Together. We started by doing a bit of research: types of crown, sizing, etc, we discovered that there is an “equation” of sorts for what size crown you should consider based on the room’s purpose, existing trim, and ceiling height. (Check out an example here). By this equation, we figured our crown needed to be about 4″ – 6″. Large pieces of crown can get expensive. But you can get the look for less by piecing together a variety of smaller moulding. We used a baseboard + a crown piece to get our custom moulding look, and our finished moulding is bout 6″ inches.
Tom’s Tip: Install the baseboard piece first. It’s easier to manage, plus it gives you something to nail the crown pieces into. Which is especially helpful if they’re a bit wonky or bowed. (Yes, wonky is a technical term). We found a baseboard that was similar to the baseboards already installed our house, so everything looks like it belongs together.
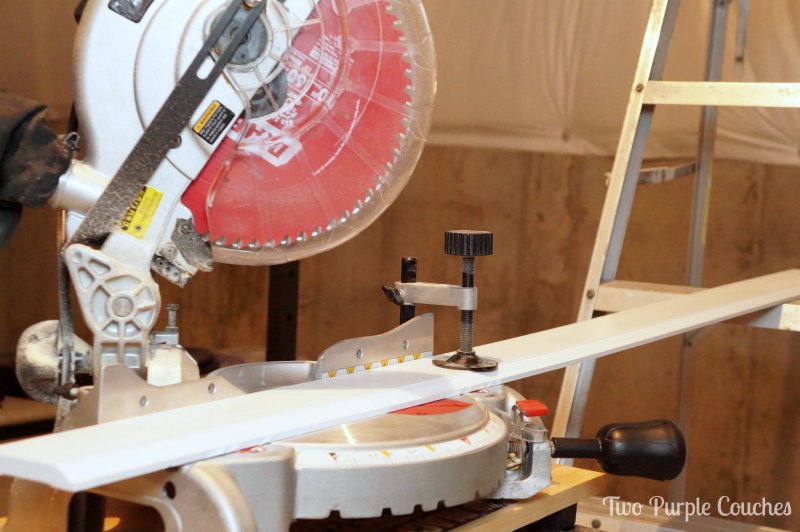
2. Level It Out. It’s really important that your boards be completely flush and level on the base of your compound miter saw when you make your cuts. Don’t let either side of the board pop up in the air because this will change the angle that you’re cutting on. And even if it’s only a degree or two off, it will affect how your pieces of moulding fit together once you go to nail them up. Take the extra time to position a ladder or some sawhorses on either side of your saw so that all of your boards will be level.
3. Nail Guns Matter. Tom considered hand-nailing our crown moulding for about 0.2 seconds. Then he did some research and asked around for opinions on a good nail gun and air compressor. And it was SO worth the money.
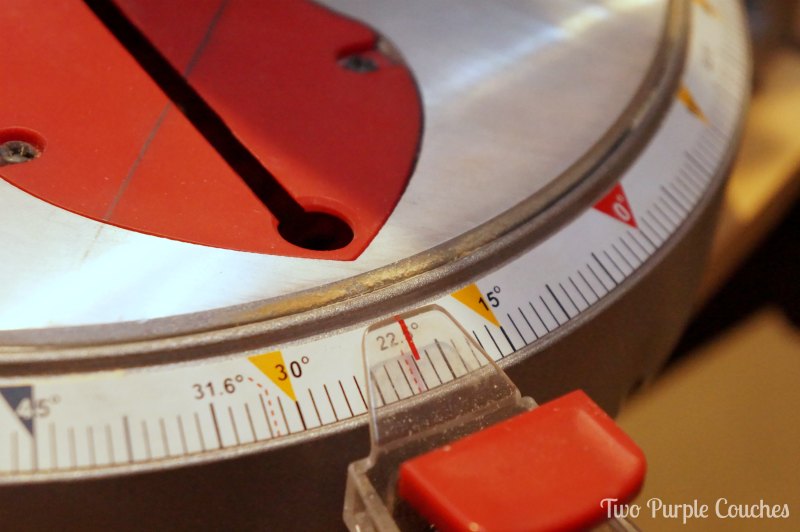
4. Angle Your Seams. We have some long walls in our family room —26-feet long, to be exact—so we knew we couldn’t get one single, long board (much to Tom’s dismay). When boards need to be pieced together, cut each piece at a 22.5-degree angle. This makes it easier to fit the boards together and helps to hide the seam once they’re installed, caulked, and painted.
5. Paint Comes Last. I know, it’s so much easier to paint the boards before you install them. But trust me, they’ll still need a coat after they’ve been put up. You’ll need to caulk each nail hole and seam, so it’s just icing on the cake to smooth over all of those spots with a fresh coat of crisp white. Also, if you can, try to get the same color paint used on your home’s baseboards and trim to keep everything consistent.
This goes for room color, as well. Install and caulk any moulding before painting the room. Then use the moulding as your cut-in line. It’ll look nice and crisp!

Have you installed moulding before? What tips and tricks did you pick up in the process?
Linking up with…
Great tips. I keep putting off and putting off installing crown in a bunch of my rooms.. but I love how it looks so much. I should just suck it up. Your tips will make it much easier.
Kim (TheKimSixFix) recently posted…Custom Star Wars Stormtrooper Kitchen Aid Stand Mixer (Tutorial)
The finished look is definitely worth it! And once you get the first cuts figured out, the rest go a bit easier 🙂
Great tips!!! And YES on the nail gun – we got one for baseboards in the basement and it was OH so worth every penny!!!
Thalita @ The Learner Observer recently posted…The Whole30 – Week 2 and Salad Dressing
Ooh, yes! It’s amazing how much faster a trim project goes with a nail gun!
Great Article! I have installed a lot of crown moulding over the years and teaching is spot on! : )
Lou Vaughn recently posted…Handicap Accessible Shower Design
Thank you Lou!
Pingback: Share It Sunday {17} -
Pingback: Share It Sunday {17} | Our Rosey LifeOur Rosey Life
Pingback: Tips You Don't Wanna Miss + GMTG #50 + $100 HomeGoods Gift Card GIVEAWAY
Pingback: Updated House Tour: Entryway and Dining Room | two purple couches