DIY Wood Snowflakes Holiday Decorations – Learn how to make your own large painted wooden snowflakes for Christmas and winter decorating!
Create your own winter wonderland at home with these large DIY wood snowflakes. You can customize the sizes to fit your home, or based on what’s available in your wood scrap pile! Plus, these handmade holiday decorations are perfect for decorating indoors or out.
Thank you to Wagner SprayTech for sponsoring this post. All content and opinions expressed here are my own. Click here to read my full disclosure policy.
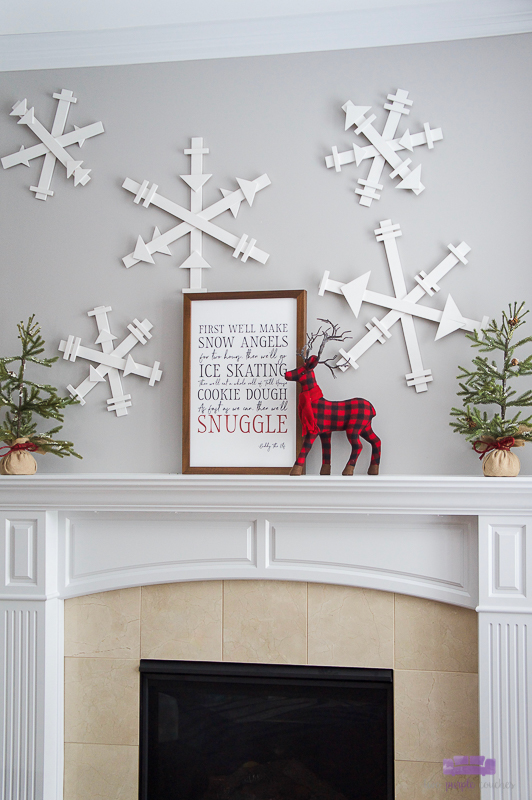
The holiday season is by far my favorite season to decorate for, and I love to change it up from year to year, especially on the mantel in our family room. It’s so fun to come up with a different “theme” or style each Christmas.
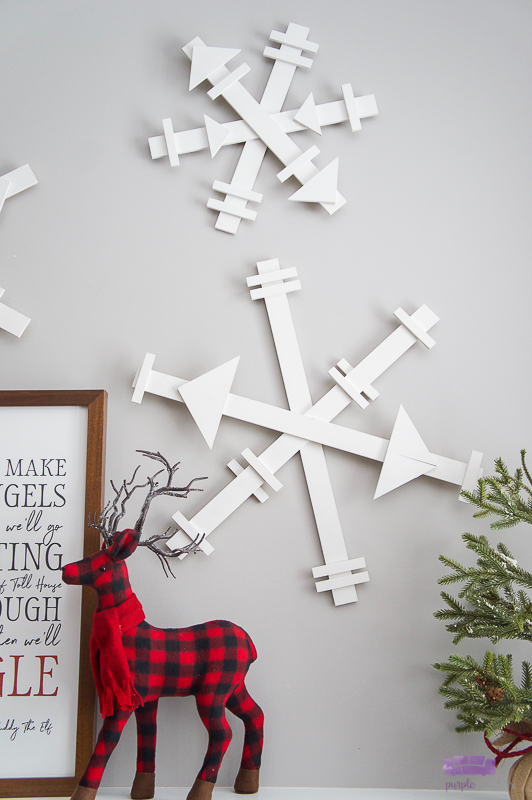
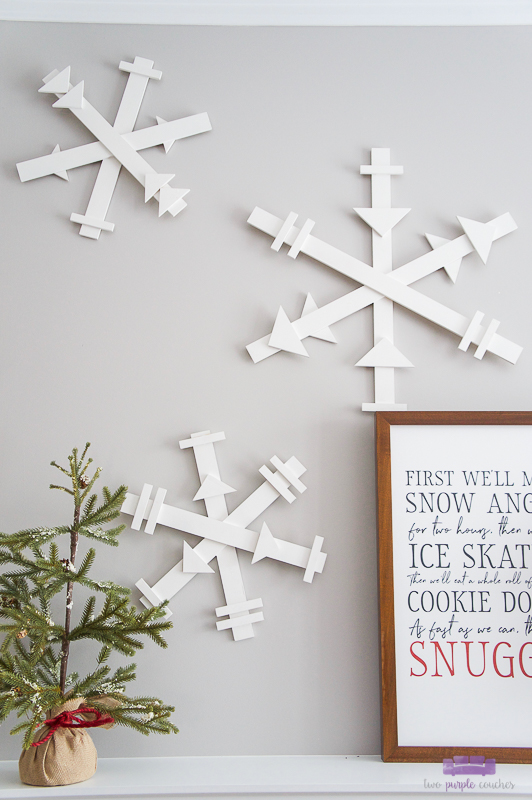
This year, my husband and I were inspired to go with a snowy look, and we wanted to make some large DIY wood snowflakes to make a big impact above our fireplace. We have 10-ft tall ceilings in our family room, so we like to have some larger-scale decorations on our mantel. These giant wooden snowflakes are just the thing!
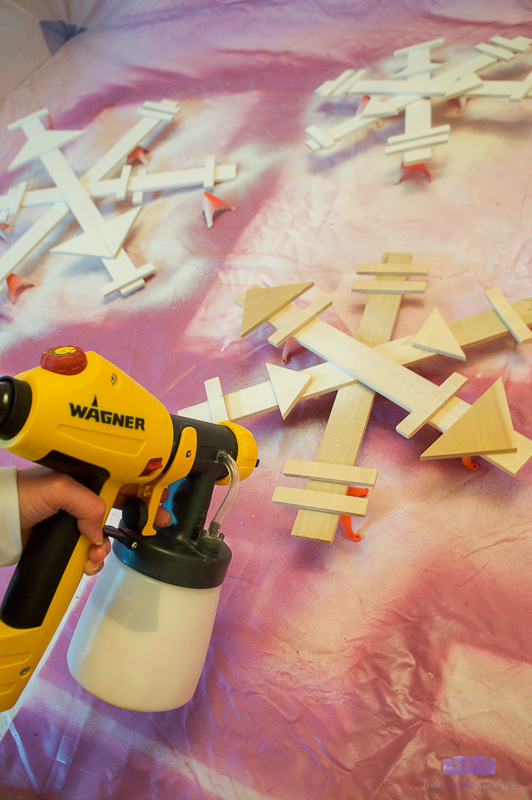
The key to getting these DIY wood snowflakes made in one weekend was using our Wagner FLEXiO 5000 paint sprayer. If you’ve been a reader for a while, you know I’ve been using our FLEXiO sprayer for all kinds of projects this year, from painting furniture and cabinets to whole rooms.
The Detail Finish nozzle that comes with the FLEXiO 5000 is perfect for small projects like these DIY wood snowflakes. It’s designed for small projects and detailed surfaces, edges and corners. And it puts down a really smooth, fine finish in just one coat. Once they were built, I got all five wooden snowflakes painted in about an hour. I also like how easy this sprayer is to clean—all you need (if you’re using a latex paint) is warm, soapy water!
This post contains some affiliate links for your convenience. Click here to read my full disclosure policy.
Supplies Needed for DIY Wood Snowflakes:
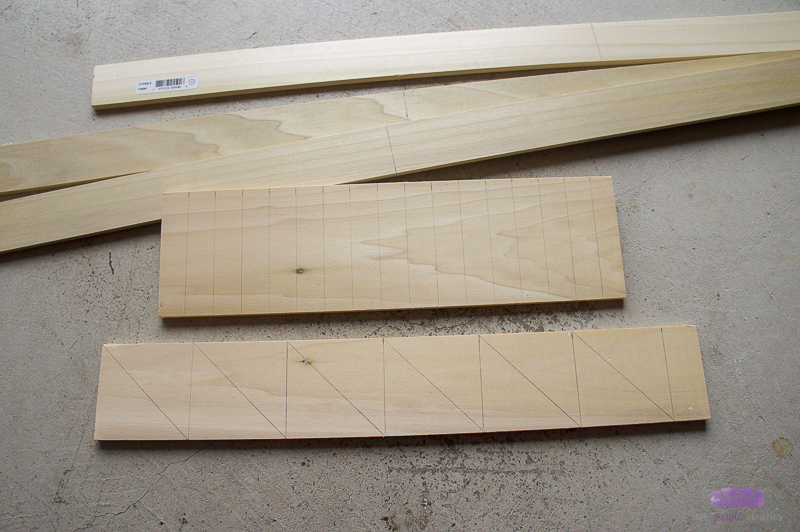
- Poplar boards, or similar wood
- Sizes depend on what size(s) you want your finished snowflakes to be. We used ¼ x 2-4 and ¼ x 2-2 boards for the main parts of the snowflakes. For the decorative triangles & rectangles, we used an assortment of ¼-inch thick poplar boards we already had.
- Compound Miter Saw
- Clamps
- Wood glue
- FLEXiO 5000 (also available here)
- Studio Spray Shelter (also available here)
- Paint
- We used leftover white interior latex
- Paint stir stick
- Small brush for touch-ups
- Hot glue gun & glue sticks
- Hanging strips
- White glitter (optional)
How to make large DIY Wood Snowflakes:
Cut and assemble the wooden snowflakes
1.) Cut poplar boards for each snowflake. For our large snowflakes, we used the ¼ x 2-2 boards as-is. For the smaller snowflakes, we cut the ¼ x 2-4 boards into thirds. We used three boards for each snowflake. For the decorative parts of the snowflake, we measured and cut ¼-inch thick boards into triangles and rectangles.
2.) Layer the long boards on top of one another, at roughly 60-degree angles. Glue together with wood glue, clamp in the center and allow to dry for at least 60 minutes.
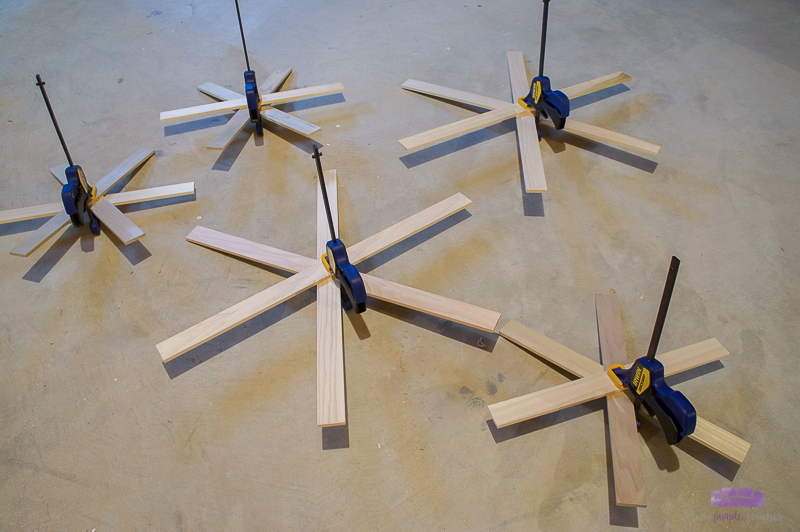
3.) Once they are dry enough to handle, attach the decorative pieces with hot glue. Playing around with the patterns is half the fun! Allow to dry several hours or overnight before painting.

Paint the wooden snowflakes
4.) Stir and pour paint into the paint cup. Using the Detail Finish nozzle, position the pickup tube to face forward and attach the cup to the nozzle. Then adjust the air cap for the spray position you want to use. You can spray in a horizontal or vertical pattern.
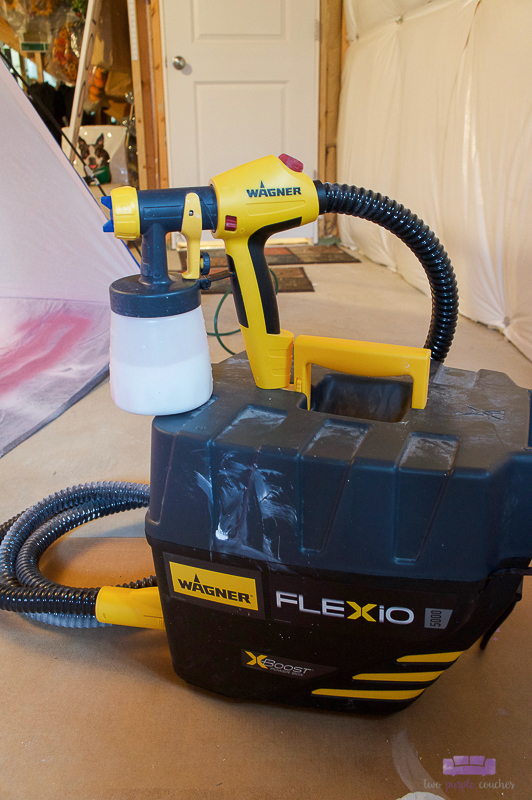
5.) Set the Air Power dial to a medium setting to start (about a 5). If the paint you’re using is thicker, you may need to increase the air power. I bumped mine up to 6 to get a good coverage.
Turn the grey knob on the handle to set the Material Flow. I always start on low and adjust as needed. I bumped this up to a higher setting since the latex paint I was using was on the thicker side.

6.) Hold the nozzle a few inches from each snowflake, moving back and forth to cover all sides, edges and detailed parts. I was able to hold and spin each snowflake to paint the sides with the sprayer, but I did still need to go back and touch up each one with a small paintbrush once they were dry.
7.) While the paint is still wet, you can sprinkle glitter over each snowflake if you want them to have some shimmer and sparkle. Allow to dry overnight before hanging. We used these hanging strips to hang our snowflakes on the wall above our mantel.
Then all I needed to add were a few extra festive touches like a large buffalo check reindeer, a pair of trees, and a sign with one of my favorite Christmas movie quotes. Now our halls are decked for the holidays and the whole winter season!
Love this? Don’t forget to Bookmark It or Pin It!
