Transform a tired Holiday Wreath with this simple trick! Add fresh modern style to any Christmas wreath in minutes with this easy DIY idea.
Are you tired of the same-old holiday wreath but don’t feel like spending time or money on a new one? I’ve got a very simple and easy DIY idea that will give your Christmas wreath a fresh new look in minutes!
While I love to change up my holiday decorations each year, I don’t love spending lots of money to do so. I’m always looking for simple tricks and DIY ideas to freshen up the look of my decorations, year after year. One of my favorite ways to do this is to add a sign or banner to my wreaths. For just a few minutes and few dollars in project supplies (or maybe you already have these on hand!), you can give your same-old holiday wreath a whole new look!
This post contains some affiliate links for your convenience. Click here to read my full disclosure policy.
How to Update a Holiday Wreath
Materials Needed:
- Wreath (any type will do – evergreen, boxwood, grapevine, etc)
- Wood veneer script word
- Similar options available here
- DecoArt Extreme Sheen in Rose Gold
- DecoArt Americana Decor Metallics in Pearl
- String or twine
- Paint brushes
- Hot glue gun (optional)
Tutorial:
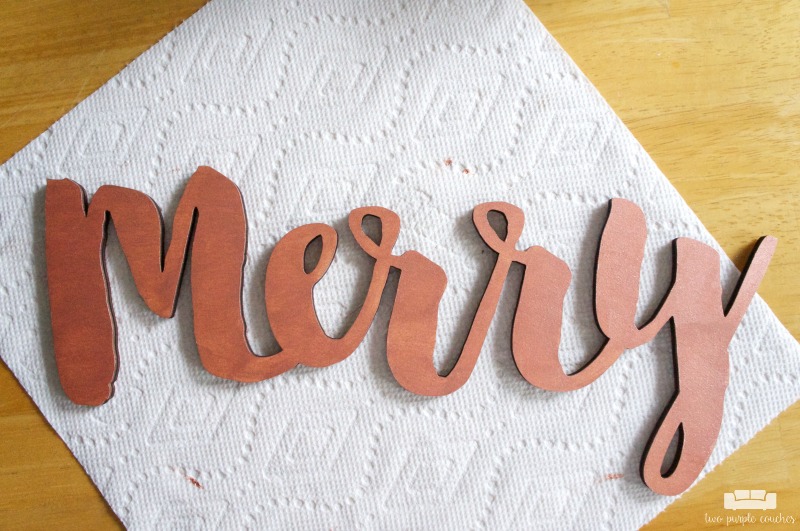
These wood veneer words can be found in many craft stores, and even at Target (I think I grabbed this one from the Dollar Spot last year). This is a great time of the year to stock up on holiday-specific words!

1.) Paint the wood veneer with one coat of DecoArt Extreme Sheen in Rose Gold. Allow to dry completely before painting a second coat, if desired.
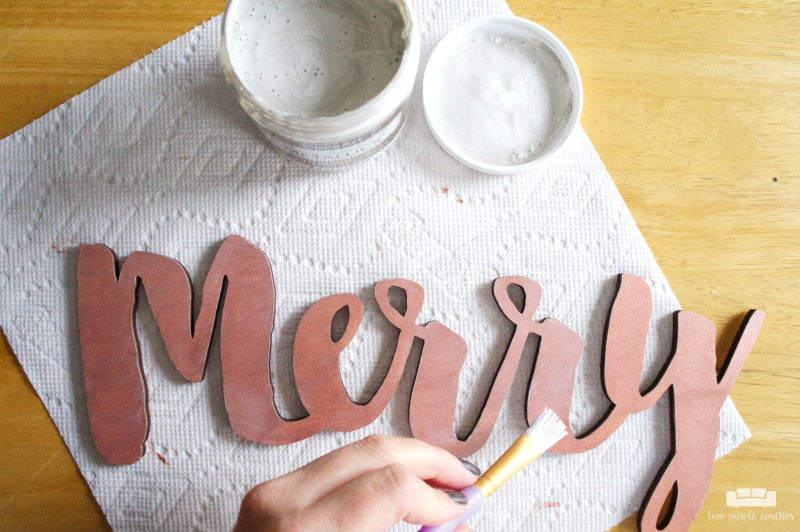
2.) Once the Rose Gold paint is fully dry, lightly brush on a coat of DecoArt Americana Decor Metallics in Pearl. Allow this to dry completely before handling.
3.) Since my scripted wood “merry” had a few loops in the letters, I threaded a piece of string through the loops in the “e” and the second “r”. If your word doesn’t have loops, or if you’d like your string to be more hidden, attach it to the back of the wood shape with a few dabs of hot glue.
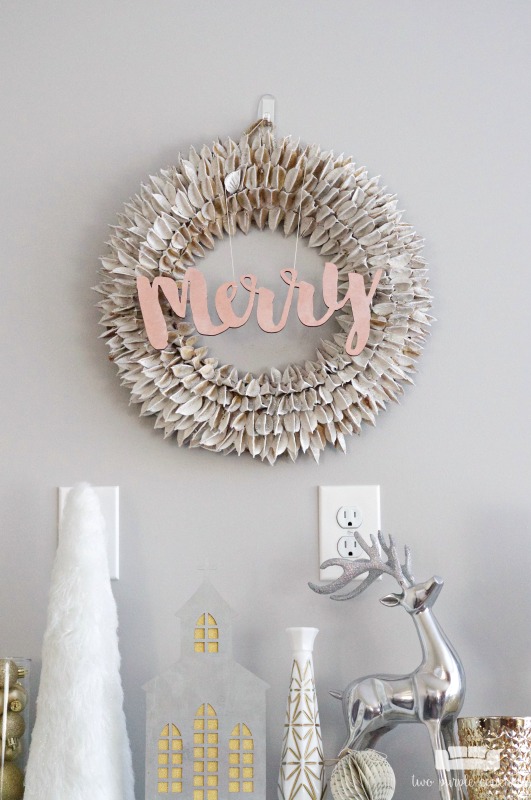
4.) Attach the wood shape to your wreath. The wreath I used is a bit fragile as it’s made from natural materials, and I didn’t want the word to crush any of the pieces. I measured the string so my “merry” sign would hang in the center of my wreath, then hung it from the same hook.

In just a few minutes, I was able to give my holiday wreath a whole new look! I love that I can change it up again if I want to, or even add this wood sign to a different wreath or surface next year. These are always my favorite kinds of DIY and crafts projects—quick, simple and inexpensive yet they make a big impact, especially above our mantel. Click here to see more of my Christmas mantel decorations.

Love this? Don’t forget to pin it or bookmark it?
Want more holiday wreath ideas? You might also like:
DIY Ornament Wreath

Pingback: 50 Awesome DIY Christmas In July Ideas - Smart Fun DIY