This article was originally published in the September 2015 Issue of VRAI Magazine.
Ready or not, signs of Fall are starting to creep into the landscape. Just in the last few weeks, I’ve noticed that the air is cooler in the mornings, the sun is setting earlier and the scent of smoke from backyard fire pits wafts through our neighborhood on weekend evenings.
Though I have mixed feelings about the onset of Fall this year, I feel the itch the adapt our decor for the coming season. I completely neglected our spaces this Spring and Summer, and so I’m looking forward to making some changes and freshening things up around our home. But this year, I’m going to do Fall with a twist—a twist of purple, that is!
I mentioned in an article last year how I struggle with the traditional Fall color palette of oranges and reds. And whereas last year I embraced neutrals and yellows, this year I am going with my signature color!
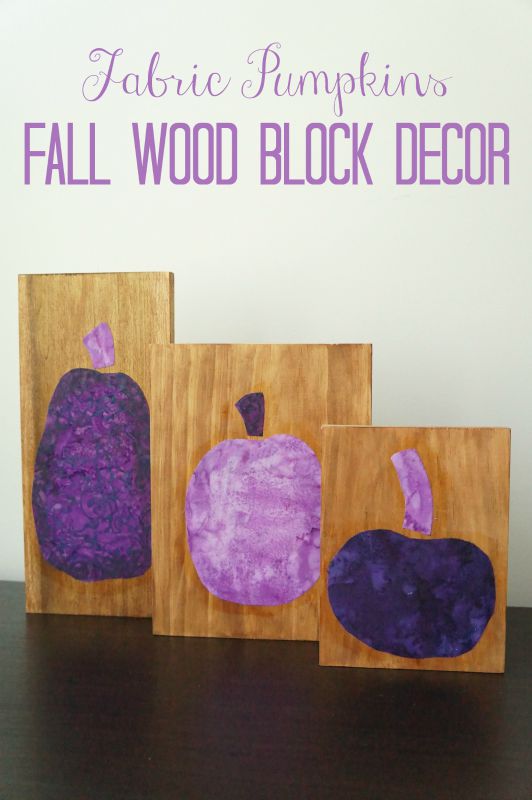
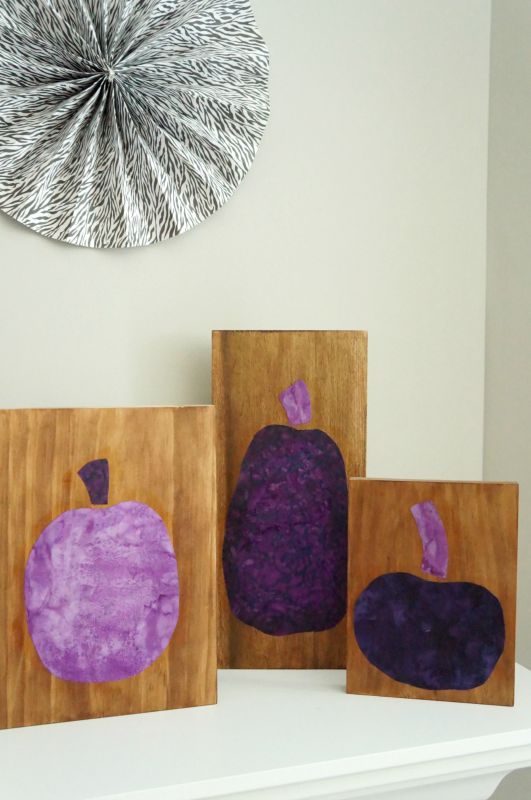
To bring a splash of purple into my Fall decor this year, I made a set of wood block decor using scrap wood and fabric. After making this easy wood and metal monogram sign, I’ve been inspired to use up more pieces from our scrap wood pile. And these wood blocks are so simple to make, that I couldn’t help but craft up a cute trio to set on our mantel. Because everything just works better in threes!
Now let me show you how to make these wood block decorations for yourself!
What You’ll Need
- Wood blocks in a variety of sizes. Here are the measurements of each of mine: tall – 12.25″ x 5.5″, medium – 9.75″ x 7.25″, small – 7.25″ x 5.5″.
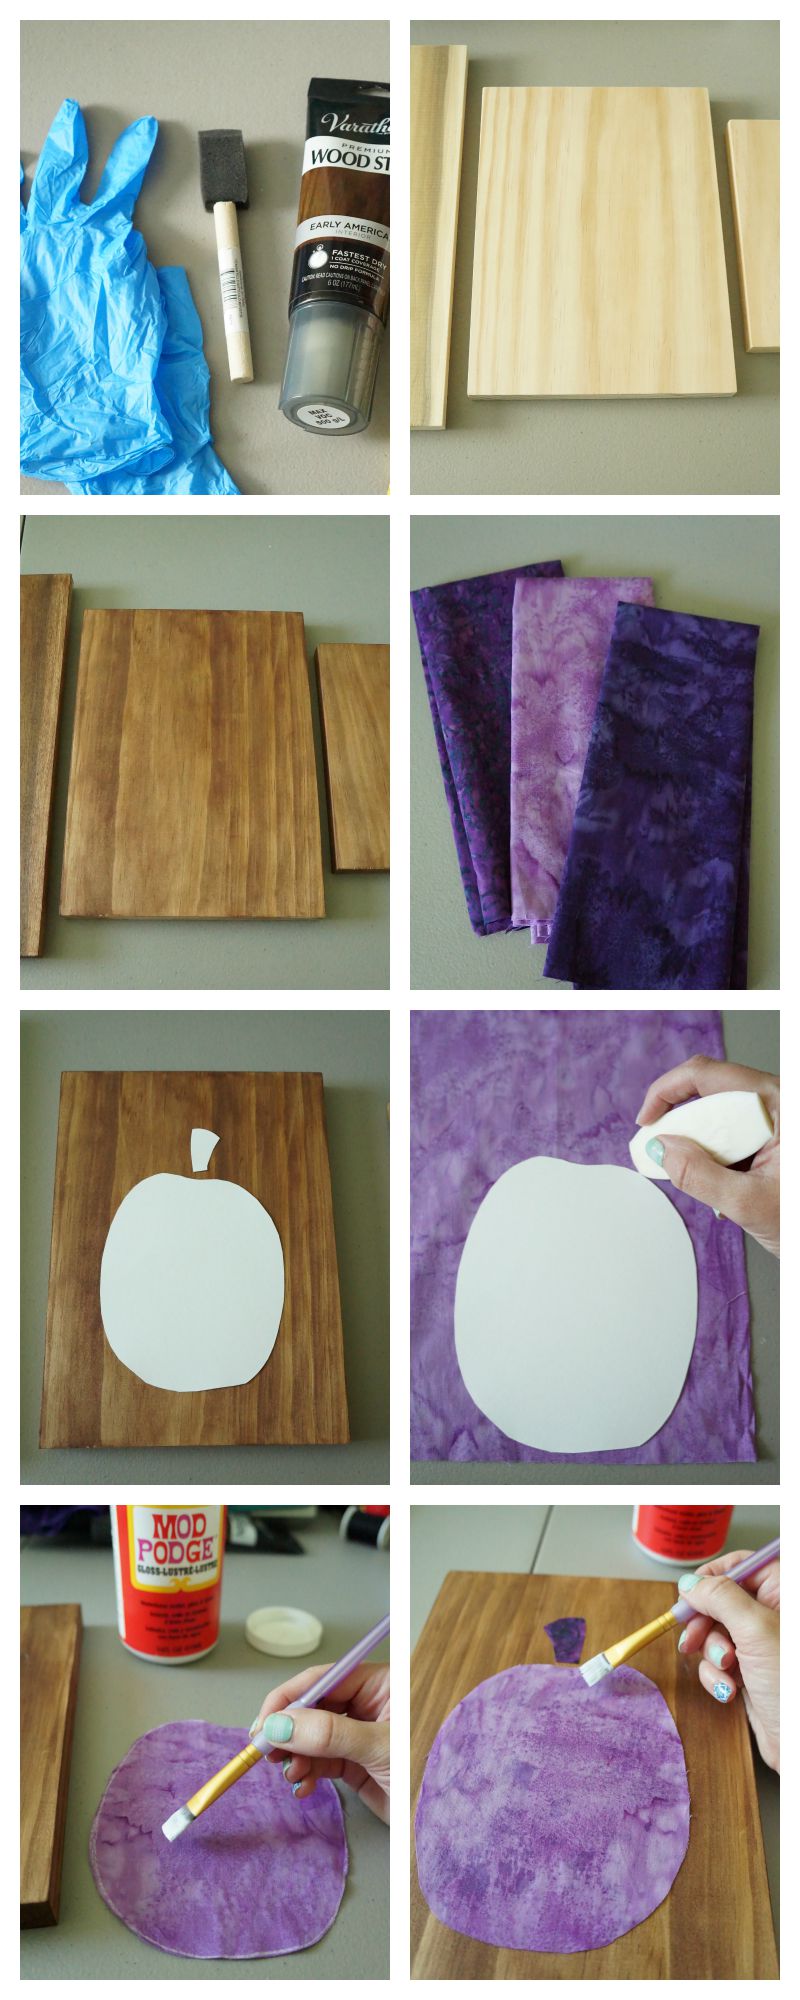
- Wood stain or paint (I used Varathane wood stain in Early American)
- Assorted fabrics
- Pumpkin shapes
- Mod Podge
- Rubber or latex gloves
- Foam brush or paint brush
- Scissors
How to Make Them
Step 1: Cut wood to desires size(s), or purchase ready-to-use wood blocks from your local craft store.
Step 2: Stain or paint each wood block. I always wear latex gloves when staining so I don’t get the stain all over my hands and fingers.
Step 3: While the stain is drying, select a few pumpkin shapes for the cutouts. I did a Google search to find a variety of sizes to fit my wood blocks – one tall and skinny, one small and round, and one in between those two. Print each shape onto card stock and cut them out to create a template to use on the fabric.
Step 4: Iron fabric(s) if needed. Then, using a fabric pen or old piece of soap, flip the pumpkin template over and trace onto the back of the fabric. This way, you won’t see the pen lines once the fabric is attached to the wood block.
Step 5: Cut each pumpkin out of the fabric(s), then brush Mod Podge to the back of each pumpkin before applying to the wood blocks.
Step 6: Once each pumpkin has been applied, go over them with another coat of Mod Podge to seal them on.
Once dry, the blocks are ready to display! Of course, you don’t have to go with purple fabrics for your pumpkins, though I quite like this unconventional twist for fall! Happy decorating!


Purple is one of my favorite colors so I love these purple blocks. I like your idea of using the colors you love to decorate no matter the season!
Kelly of Simply Kelly Designs recently posted…Mommy’s Angel Onesie
Thanks Kelly! In years’ past, I’ve always felt like I need to switch my color palette, but not this year! 😉
I love how rustic these pumpkins look (using fabric on wood was brilliant!), and your non-traditional color palette is lovely!
Christine | Where The Smiles Have Been recently posted…Shabby Chic Happy Fall Pumpkin Door Hanger: My Girly Gourd
Thanks Christine! I love the fabric-and-wood combo, too!
Purple is my color and it’s perfect for fall. What a great idea for fabric and scrap wood. Super cute! #MerryMonday
Thanks Jenny! I having been loving purple for Fall, too!
Pingback: 25 DIY Pumpkin Ideas to Decorate Your Home- Merry Monday #222 - Cookies Coffee and Crafts
Decorating with pumpkins is one of my fall favorites. Today I’ll be sharing your pumpkin decor at Merry Monday.
Thanks so much Jenny!
Great way to use up scrap wood and fabric to decorate for all. Will be featuring this on tonight’s MM.
Thank you Erlene!