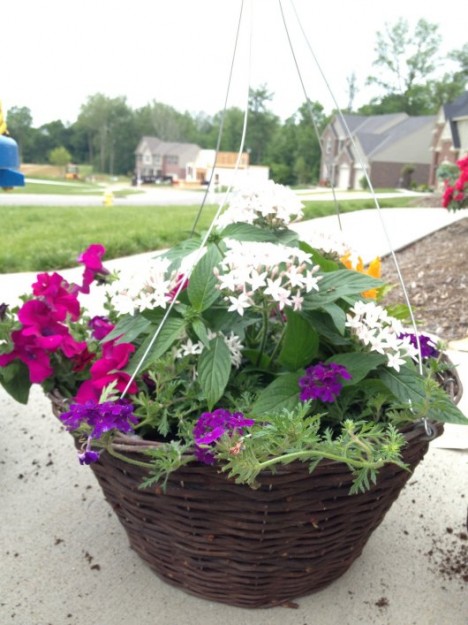
I’ve been a fan of container gardens since we got married and moved into a third-floor condo that had two decks. There’s quite a lot you can do with a few planters! I’ve carried my admiration to our new home, and it’s still proving very handy since we haven’t really touched our backyard yet as far as landscaping is concerned. We have lots of ideas, but those ideas cost money, so for the time being, we’re content with our patio set, grill, and whole bunch of pots full of pretty blooms.
You can always find gorgeous ready-made planters at nurseries or even Lowe’s and Home Depot, but they often charge a lot. So why not create, or re-create, the look yourself?
For this pot, I selected a Spike Dracaena, Geranium, Gerbera Daisy and Vino Coleus:
To put your own together, start by choosing a container. I personally love the larger ones that I can fill with a variety of flowers and greenery. You can find a nice planter anywhere, from a garden center to Target to the dollar stores. And if you like the shape or size but not the color? Bust out the spray paint!
Once you’ve got your perfect container, select a quality potting mix; I’d suggest one that has plant fertilizer already mixed in. This will help your flowers sustain growth and produce more blooms throughout the summer. If your container doesn’t have holes for drainage, consider putting a layer of rocks in the bottom. Roots shouldn’t sit in water because this can cause them to rot and kill the plant. If you’re more of the power tool persuasion, drill a couple of holes in the bottom. Fill your container with potting mix, stopping about 1-2 inches from the top. This makes it easier to shift the soil around to get your plants in. You can top it off when you’re finished.
Now comes the best part: planning your arrangement. Select a variety of flowers that like the same amount of light, then play around with height, fullness, and color. I like to have a couple of tall plants near the back or center, then add mounding or trailing flowers to the front that will cascade over the side.
When you’re ready to plant, gently remove the plant from the plastic pot. Then loosen and break up the roots so they can spread and grow in the new soil.
Make a small divot in the soil, then place your plant, pressing down a bit to be sure the roots are covered.
Repeat with each plant, until your container is full. I usually eyeball how many plants I think will fit into one container. I know the tags that come in each plant usually give you a recommended spacing. I consider those to be guidelines. In my experience, plants like to be buddy-buddy, not wallflowers (aaahhhhahahahaha, pun intended).
And there you have it! Now go, plant all the containers you can find!!


Cute! Love it 🙂
Thank you!
Very cute!
Thank you 🙂
Pingback: Two Purple Couches | PILLOWS A-LA-MODE
I wanted to let you know I am featuring this great project at #merrymonday this week. I hope you will check it out when you have a chance! https://ourcraftymom.com/10-beautiful-diy-planter-ideas-to-add-instant-curb-appeal/