DIY Christmas Tree String Art Ornaments are a fun handmade holiday craft. Follow this simple tutorial to make your own rustic wood slice ornament!
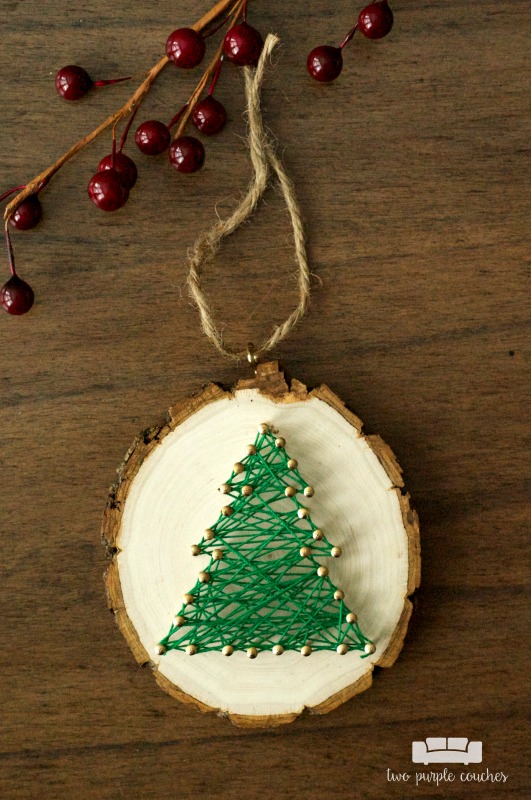
String Art Ornaments lend a wonderful rustic touch to your holiday tree, and they’re easier to make than you may think! Plus, they make wonderful handmade gifts for everyone one your Christmas list. Keep reading for the full tutorial and to see 46 more handmade Christmas ornament ideas!
Today I’m sharing my Christmas Tree String Art Ornaments for our 2017 Ornament Exchange. This is my third year participating in the Exchange, and every year I love it more. Click here to see my 2016 ornament / Click here to see my 2015 ornament. There are so many creative ornament ideas and I love seeing what everyone makes and receives!
Everyone participating in the Ornament Exchange is paired with a blogger with a similar Christmas tree style. This year, I was paired with Tylynn of Bitterroot DIY—we both have traditional, rustic/woodland styles for our Christmas trees. Hop on over to her blog and check out some of her incredible DIY and woodworking projects! I knew I needed to incorporate a wooden element into her ornament!
I’ve done a few string art projects before (one of which can be found in my Home for Fall ebook) and I’ve been wanting to try string art ornaments. After browsing Tylynn’s blog, I knew a rustic string art ornament would suit her style!
This post contains some affiliate links for your convenience. Click here to read my full disclosure policy.
How to make Christmas Tree String Art Ornaments:
Materials Needed:
- Basswood coaster (similar options here)
- Mine is about 3.5-inches wide; I’d suggest using one of a similar size.
- Green cotton crochet thread
- Linoleum Trim Nails, 5/8″ x 16
- Hammer
- Scissors
- Eye screw
- Twine or thread
Tutorial:
1.) Draw or print out the shape you’d like to create. I chose a basic tree/Christmas tree shape for my string art ornaments.
2.) Center the tree shape on a basswood coaster and secure at the top and bottom corners with linoleum trim nails.
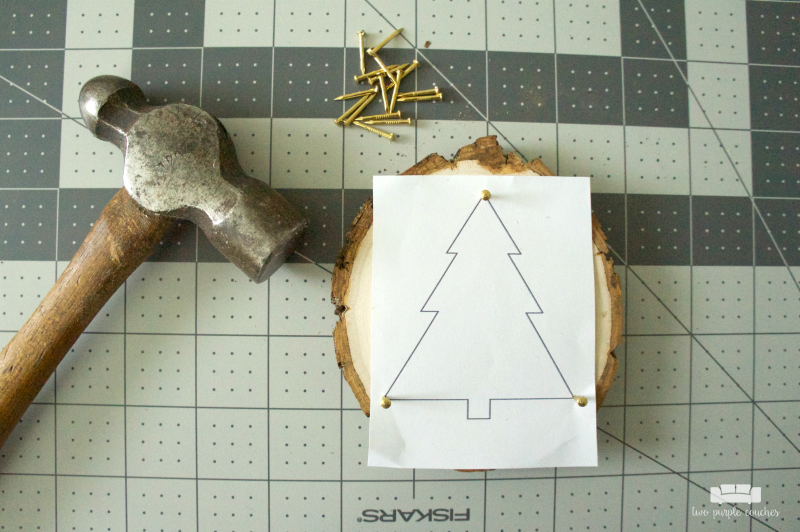
3.) Fill in the rest of the tree outline with trim nails. I spaced mine about a finger/thumb width apart. If they’re too close, it will be harder to work with the string and if they’re too far apart, the thread may become too loose as you work.
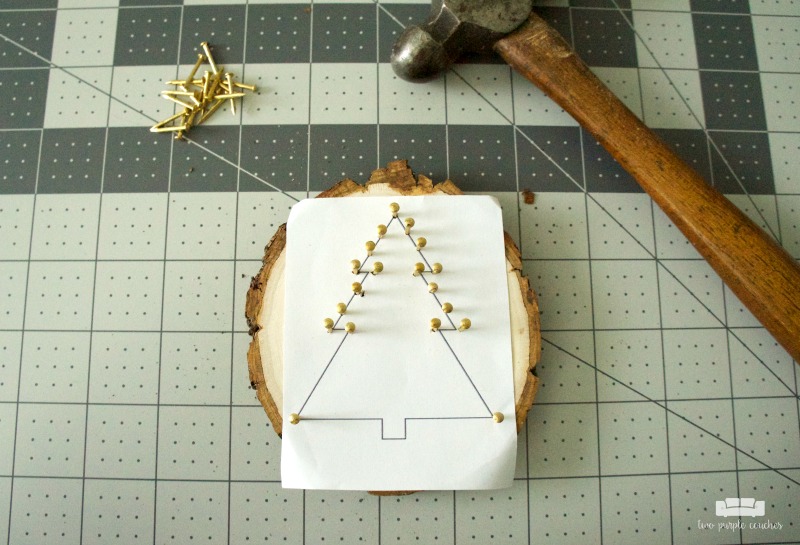
Once you’ve outlined the whole shape with nails, rip away the paper template.
4.) Starting at the top or bottom, knot the cotton crochet thread around one nail. Begin looping and criss-crossing the thread around each nail. I like to start by outlining my shape, then filling in the center. You can work in a pattern or randomly, but you’ll need to keep the thread taut throughout this step.
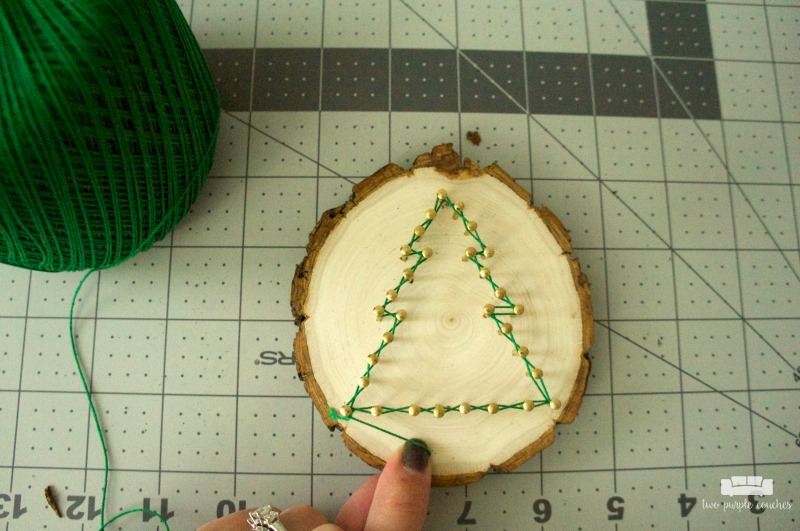
5.) Once your design is filled in how you like it, tie another knot around a nail to secure the thread. Trim away any excess thread.
6.) Add an eye screw to the top of the ornament and thread with twine or a hook to hang your string art ornaments on your Christmas tree!
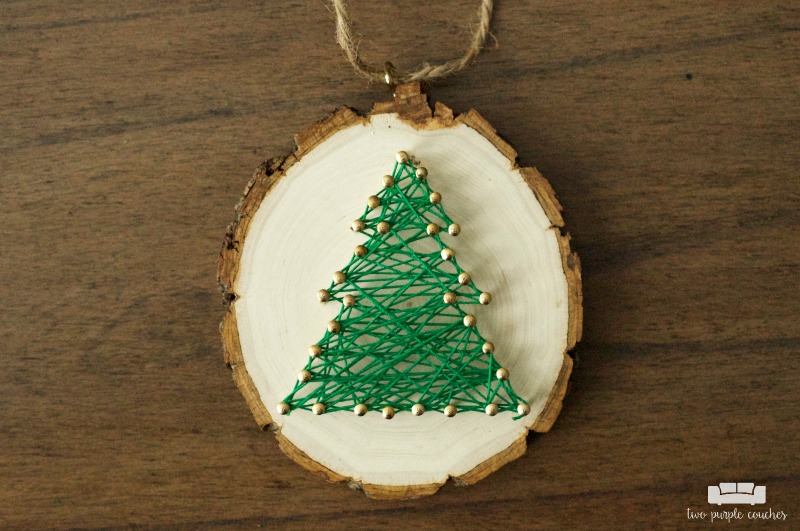
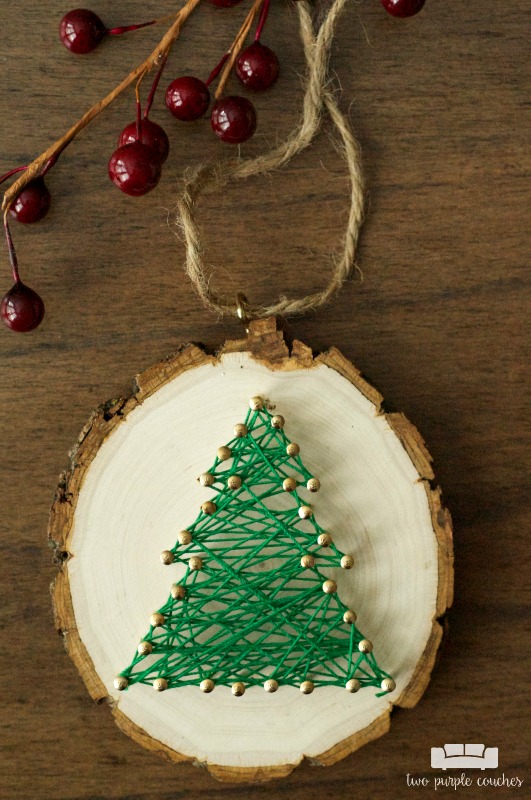
Isn’t it cute!? You could make a whole forest to keep or gift! Keep scrolling to see more handmade Christmas ornament ideas!
Love this? Don’t forget to pin it or bookmark it!
2017 Ornament Exchange
Welcome to the 2017 Ornament Exchange & Blog Hop! This year, there are 47 amazing bloggers participating in the exchange. The rules of the challenge were simple: be partnered with a fellow blogger, create a handmade ornament for $15 or under, create a tutorial, and ship the ornament off to a new home!

Meet the 2017 Ornament Exchange Hosts
Erlene ⋅ My Pinterventures Kim · Made In A Day Amanda · Domestically Creative
Shirley · Intelligent Domesticatons Michelle · Our Crafty Mom
Beverly · Across the Blvd. Christene · Key to Inspiration Pili ⋅ My Sweet Things
Nicki · Sweet Parrish Place Megan · C’mon Get Crafty
Hilary · Raising Fairies and Knights Emily · Two Purple Couches
Tina · One Crafty Mess Marie · The Inspiration Vault Debra · Shoppe No. 5
Trisha · Rosewood and Grace Jeanie · Create and Babble Katrin ⋅ Kreativ K
Terri · Christmas Tree Lane Maureen · Red Cottage Chronicles
Toni ⋅ Small Home Soul Ula ⋅ Lulu & Celeste Sue ⋅ A Purdy Little House
Pamela · Home On The Corner Lorelai ⋅ Life with Lorelai Cindy ⋅ DIY Beautify
Debbie ⋅ Tweak and Style Stephanie ⋅ Swoodson Says Chelc ⋅ Inside the Fox Den
Susan ⋅ Super Mom – No Cape! Molly ⋅ Just a Little Creativity
Roseann ⋅ This Autoimmune Life Angela ⋅ Simply Beautiful by Angela
Vicki and Jenn ⋅ 2 Bees in a Pod Joanne ⋅ Our Unschooling Journey
Tylynn ⋅ Bitterroot DIY Sam ⋅ Raggedy Bits Mary ⋅ The Boondocks Blog
Cyn ⋅ Creative Cynchronicity Dione ⋅ Clever Chameleon Quilting
Erica ⋅ Erica Ever After Chelsea ⋅ Love Paper Crafts Evija ⋅ From Evija with Love
Samantha ⋅ Little Bits of Home Hope ⋅ Hopes Crafty Niche Anne ⋅ Orange Bettie
Pam · P.S. I Love You Crafts
FIND ALL 47 HANDMADE ORNAMENT TUTORIALS BELOW AND SHARE YOURS TOO! Use Hashtag #2017OrnamentExchange so we can see your creations on social media.

Emily – This ornament is super cute! Love the string art tree and love it even more on the wood slice – super creative!
Thanks ladies! I’m so happy with how this one turned out 🙂
What a sweet little ornament! I haven’t done string art since my teens. It’s such fun that it’s come back around. 🙂
Thank you!
That would look amazing on my holiday tree! Bringing the rustic back, beautiful.
I also participated in the #2017ornamentexchange, what beautiful ornaments everyone has made!
Thank you! I love this hop for the same reason – so much creativity!
I absolutely love this ornament, it is so cute and I really want to try out the string art now too! #2017OrnamentExchange
Thank you Evija!
So pretty! Thanks for the great tutorial. I’m putting this on my must make list. Pinning.
Beverly recently posted…2017 Ornament Exchange Blog Hop
Thanks Beverly! It was fun to make 🙂
I always love seeing your Christmas ornaments because I am a traditional girl at heart. I love the one from last year but I do believe you outdid yourself for this year’s ornament. It is so lovely.
Aw, thank you so much Debra!
So cute! My daughter loves to do string art, so this is perfect! Thanks for sharing your idea. I participate in the exchange too, and I love seeing what everyone else makes!
Thanks Pamela! Me too!
This is SO cute Emily! I still want to try string art sometime, and doing it as an ornament is genius!
Amanda @ Domestically Creative recently posted…Mini Wood Framed Sign Ornament
Thanks Amanda! Ornaments are a great way to get into string art 😉
Emily these are beautiful and such a unique idea to make the string art on wood slices!! I love them!
Katrin recently posted…DIY Vintage Farmhouse Style Baking Tin Ornaments – 2017 Ornament Exchange
Thanks so much Katrin!
What a fun idea Emily! I’ve done string art in the past, but am in love with your miniature version!
Thank you so much Cindy!
How sweet Emily! I have not tried string art yet. You make it look so easy. I’m pretty sure I would split that wood. Gorgeous!
Kim
Thank you! I think you’d love string art, Kim!
This is such a creative way to show off that string art. Love it on the rustic wood slice.
Mary recently posted…How to Make Easy Wall Decor for the Holidays
Thank you Mary! I love the wood slice, too – it’s perfect!
I have a soft spot for string art, as I remember my mother making it when I was small. I really like your ornament, and I’m not surprised you are back for a third go at the swap. It is just amazing!
Thank you so much Dione! It’s such a fun swap, and each year it gets better!
I’ve always wanted to a string art project and just haven’t gotten around to it. I’m going to have to push this up on my project list and make one of these cute ornaments. Thanks for joining the #2017OrnamentExchange!
Thanks so much for hosting & organizing Erlene! Ornaments are the perfect place to start with string art 😉
What a fun idea to do string art on an ornament! It turned out great!
Thank you Megan!
Pingback: 90 Homemade Christmas Ornaments - My Creative Days
Those are so cute! Green string art is perfect for a design like a Christmas tree, and I love it on the wood slice! 🙂 Lisa
Thank you, Lisa! These might be my favorite DIY ornaments 🙂