Many thanks to CedarSafe for providing the cedar planks for this project. All opinions are my own.
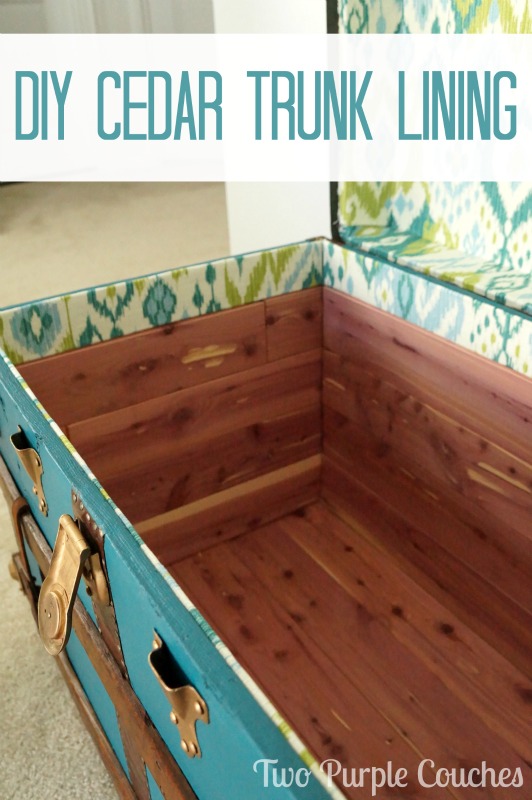
Yesterday I shared the bold makeover I gave to a beat-up vintage trunk I had in my basement, and today I’m going to share how to build a DIY cedar lining using tongue-and-groove cedar planks from CedarSafe.
When I started thinking about repurposing this trunk, I knew I needed a solution to get rid of its incredible musty smell. How in the world did this trunk still smell like my Grandma’s basement after 17 years!? I have no idea. But it needed a smell makeover something fierce! And aromatic cedar is perfect solution. And it happens to be one of my favorite scents. Seriously. When we’re at the hardware store, I have to walk past the cedar in the wood section just to smell it. I love it that much.

Cedar is also a fantastic choice for lining a trunk because it naturally repels moths, cockroaches and silverfish. So now this trunk is perfect for storing blankets, sheets, extra throw pillows, even sweaters or other nice clothing items, with no worry of insects eating holes in them! If you’re feeling really ambitious, you could build a whole closet out of cedar, but adding a liner to an existing trunk is a great way to get the benefits of cedar without having to undertake a huge project.
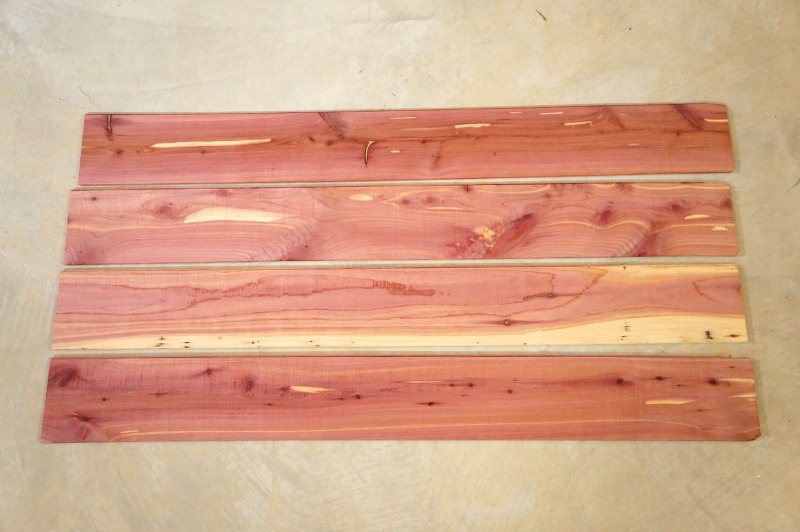
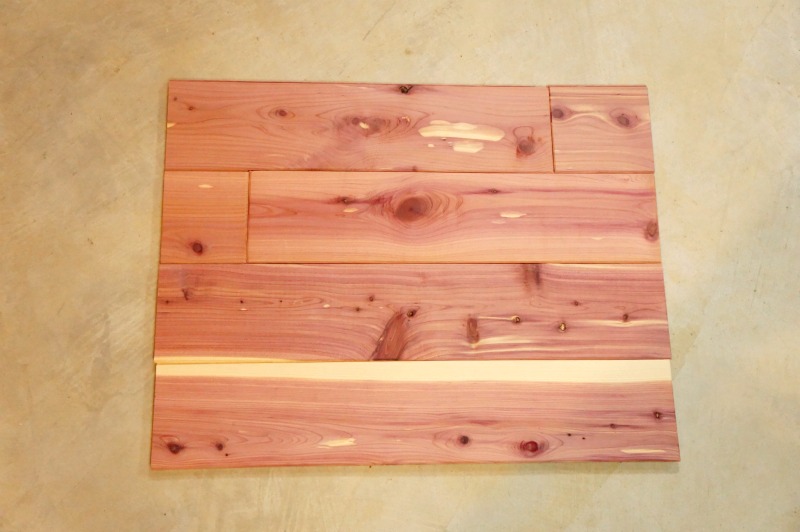
To build our DIY cedar lining, we started by measuring the length of the bottom of the trunk. Overall, this trunk measures about 33″L x 19″W. Using a compound miter saw, we cut each plank to the length needed. I suggest cutting the first plank slightly longer than needed. Then you can shave off a blade-width of board until it’s the perfect length to fit—and use it as a template for your next cuts. Much better than cutting a board too short and wasting materials!
The CedarSafe planks are tongue-and-groove, so they fit together pretty easily. If I’d been installing these planks to a wall, I would’ve used a nail gun to secure them. But I was worried that this trunk wasn’t thick enough to allow for that, so instead we used Liquid Nails.
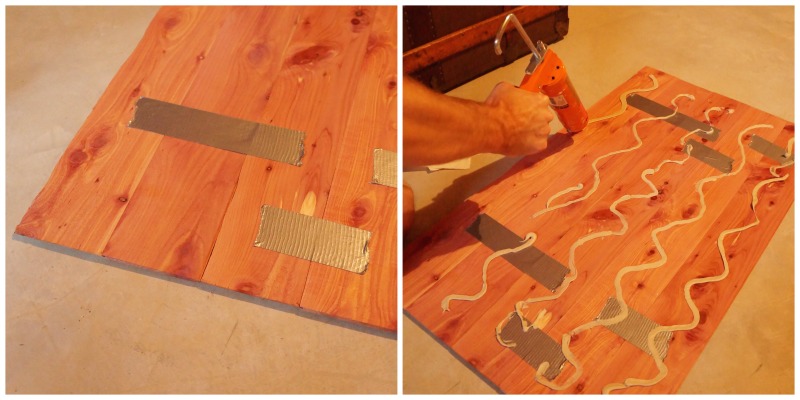
For installing the bottom, we found it easier to assemble the planks on the floor, then flip them over and use duct tape to secure them together. Then we applied Liquid Nails to each board, carefully flipped it back to right-side-up and slid it into place in the bottom of the trunk. Five planks perfectly fit the width of the bottom. (whew!)
To build the lining for the sides of the trunk, we measured the length of each side and cut our planks with a compound miter saw. Apply Liquid Nails to the back and glue the first board into place, resting it on top of the newly-lined bottom. Apply Liquid Nails to the next board, then slide the tongue-and-groove into place and press firmly until the glue starts to work its magic. You can also clamp each board for extra security.
We built up each side plank-by-plank. For the shorter sides, we pieced scraps together, which actually gave the sides a really neat look, like you’d achieve on a planked wall. Now we’re wishing we’d done this on all four sides. This definitely adds to the assembly time, because it’s like putting a puzzle together, but the finished look is so cool!
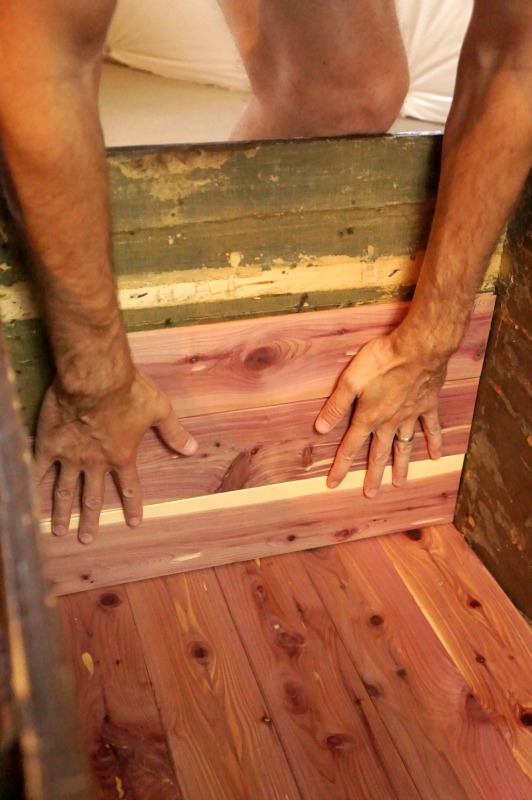
It helps to have a buddy for a project like this. The long sides of the trunk required two sets of hands to slide the planks into place and ensure that neither side was bowing out. Once we got the hang of the installation process, it went pretty smoothly and quickly.

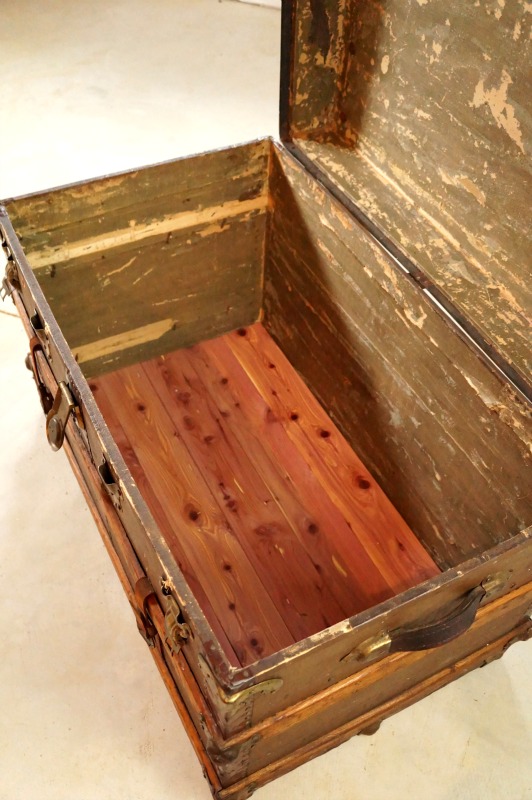
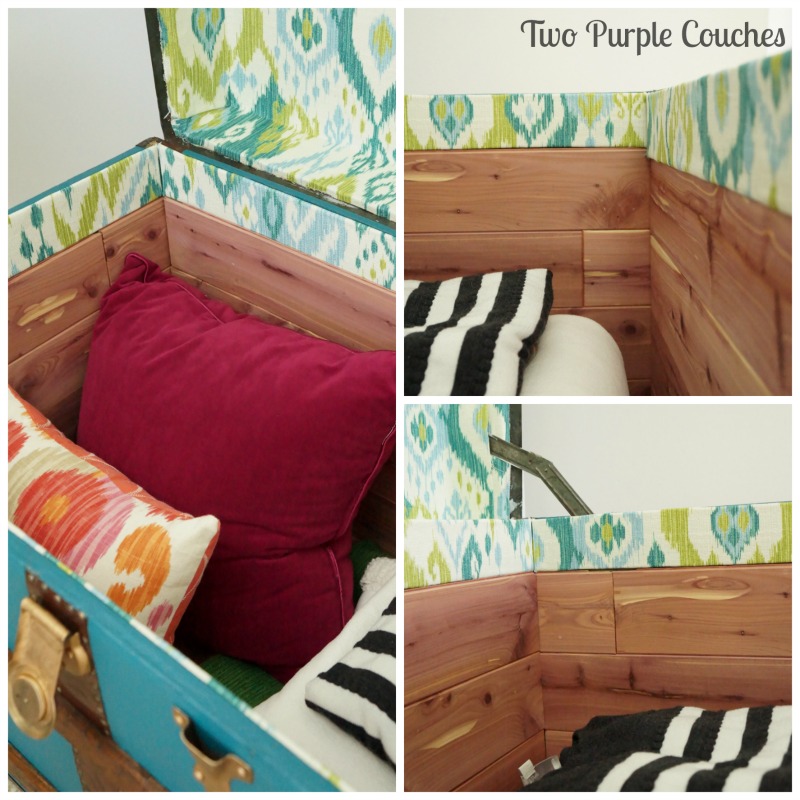
You can see in the photo above that the cedar lining doesn’t extend to the top of the trunk. The space left at the top was shorter than the width of the boards, and originally, we were planning to cut planks in half length-wise to finish off the top. But after giving it some thought, we worried that doing this might cause the planks to splinter. Plus the side of the trunk with the hinge posed some challenges, because the hinge needs to be able to move and collapse as the lid is opened and closed. So instead of experimenting and potentially wasting planks, we opted to finish off the top few inches with cardboard pieces wrapped in the fabric that I used to line the lid.
If you’re interested in building your own cedar lining, or even creating a whole closet, be sure to check out CedarSafe here! Their products are also available at Home Depot and Lowe’s.
I absolutely love how this DIY cedar lining turned out. And it was by far the easiest part of this steamer trunk makeover! Each time I crack open the trunk’s lid, the most incredible scent of cedar comes wafting out. Ahh!

Sharing with: Work It Wednesday / Home Decor & More
Want to see more vintage trunk makeover goodness? Check out these posts:
This is so gorgeous, Emily! I love the smell of cedar too so am a little jealous of this gorgeous trunk! 😉 Great job! 🙂
Jennie recently posted…Art Books You and Your Kids Will Love – Lab Series
Thanks you so much, Jennie! You really can’t beat the smell of cedar – it’s so good!
I was just wondering how much of the cedar safe you used and about how much it costed? Thanks!
Love this so much Emily!!
April R – Uncookie Cutter recently posted…Fish Tacos – You Link It, We Make It Final Party
Thank you so much April 🙂
It looks like the planks you have in your bottom are 33+ inches long. However, when I go to CedarSafe, they seem to only have a product that is 13.5″ long. What was the exact product you used?
Hi John, try checking your local hardware store (such as Lowes or Home Depot) for CedarSafe products. The boards I used were their tongue and groove Closet Liner solid cedar planks. A box of these planks contains a variety of lengths, the longest planks being about 4-feet long. I hope this helps!
Helli
I recently lined an antique trunk using your tutorial to help me out. I lined it with the Cedarsafe cedar planks and I also use the duct tape and Liquid Nails method to keep my boards together while I sttached them to the inside walls of my trunk. With it all done, it looks gorgeous but anytime that I shut the lid fora little bit, the inside of the trunk smells like liquid nails. And you can barely smell the cedar. I tried putting an open container of cat litter inside the trunk and leaving that for a few days, and that hasn’t worked. Did your trunk have a liquid nails smell when you finished?
Hi Robyn, thank you for your comment! I haven’t had a problem with my trunk smelling like Liquid Nails. I did leave the lid open for a little while after I finished it – it may have been for several weeks. Perhaps try that and see if it helps? I hope you’re able to get the smell to go away! I’m at a loss as to why that happened!
Hi…..I know this post may not be seen since it’s been 2 years but I am currently refinishing a steamer trunk and am planning on using the Cedarsafe material. My question is you said you used “cardboard” and wrapped the fabric around it. Did you use cardboard box material of poster board? When I removed the paper and backing inside this trunk it appeared the backing material was more like poster board than thick cardboard.
Thanks for your reply in advance.
Hi John, thanks for your comment! I believe I actually used cardboard from the CedarSafe box, so it was a thicker, sturdier type of cardboard. I only used the fabric-wrapped cardboard for the small section around the perimeter where the trunk’s hinge is located. This allows the top to open and close easily. Plus, I was afraid that trying to cut a CedarSafe board length-wise would cause it to split and splinter. The cardboard seemed like the best solution! I hope this helps!
This is what I plan to do to an antique trunk I just bought. Large German tin and bit of wood. Needs TLC. I want to line with cedar like this. Thank you for the DIY projects.
That looks super… I have some ideas now for a trunk make over. I have an old trunk that my dad made before he & my mom we’re married 60 years ago. Cedar lining will be a great idea.