I’m excited to be Joining a group of blog friends to bring you new Silhouette projects each month! Be sure to scroll to the bottom of this post to see all of the projects being shared today. I’ll admit I don’t use my Cameo as much as I should, but I’m looking forward to these challenges and themes each month that’ll force me (in a good way!) to start creating with it more often. I feel like using my Silhouette is like learning to ride a bike – it takes some practice to get the hang of it, but once you do it’s smooth sailing!
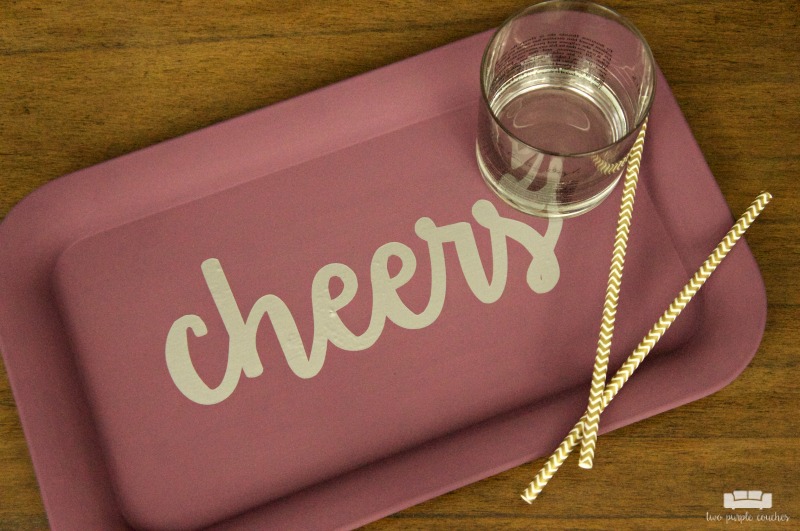
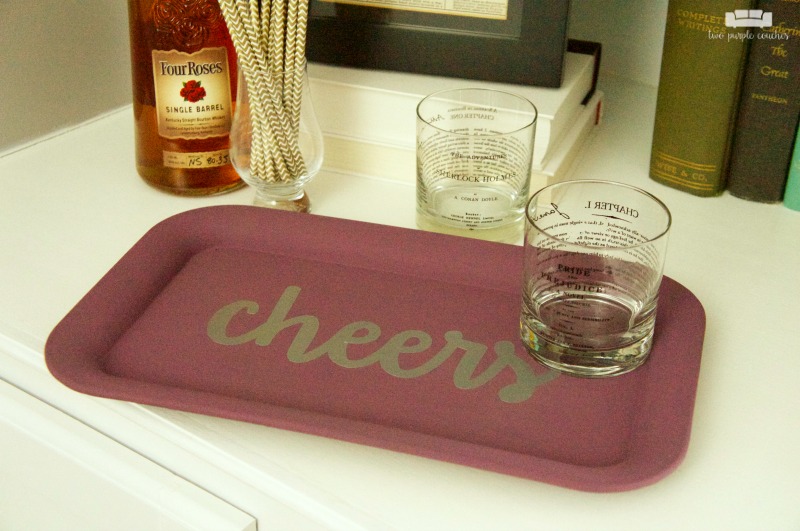
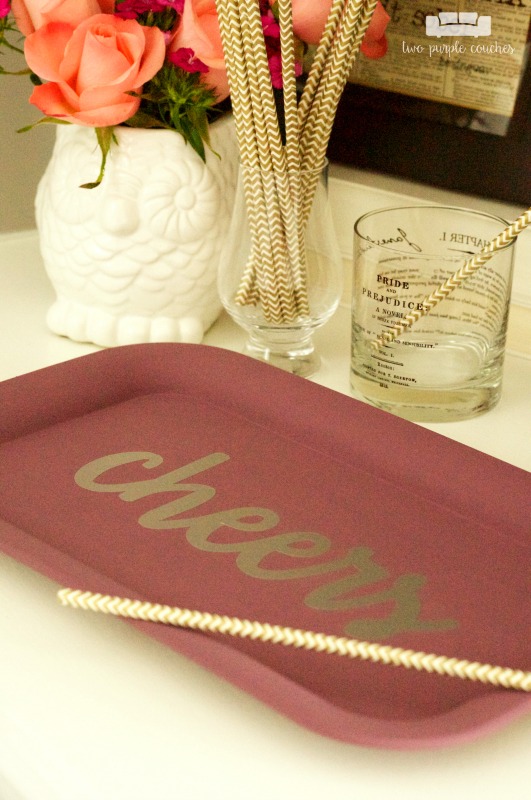
To kick off 2017, our Silhouette Creators theme for January is to make something old new again. I took a thrift store metal tray and turned it into a chic DIY bar tray for my office.
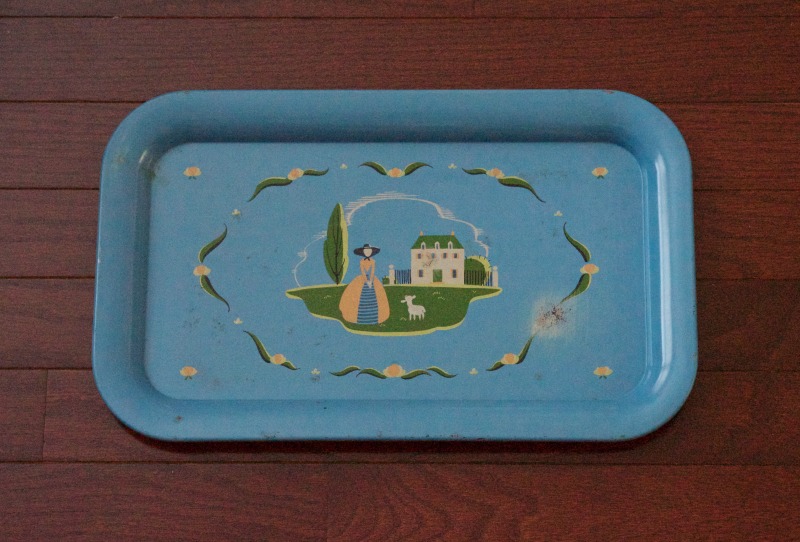
I actually have a pair of these metal trays from one of last year’s Swap It Like It’s Hot challenges. I’d already painted one and have been using it around our home. I love how the deep purple color looks on it, so I painted the second one the same way and added a vinyl decal to turn it into a mini bar tray!
This post contains some affiliate links for your convenience. Click here to read my full disclosure policy.
How to make a DIY bar tray
Materials Needed:
- DecoArt Americana Decor Chalky Finish paint in Victorian
- Silhouette Cameo Cutting Machine
- Silhouette Adhesive Vinyl in Silver
- Silhouette Transfer Paper
- Metal or wood tray
Tutorial:
1.) Paint the tray. After washing and drying the tray, I painted both the top and underside with two coats of DecoArt Chalky Finish paint.
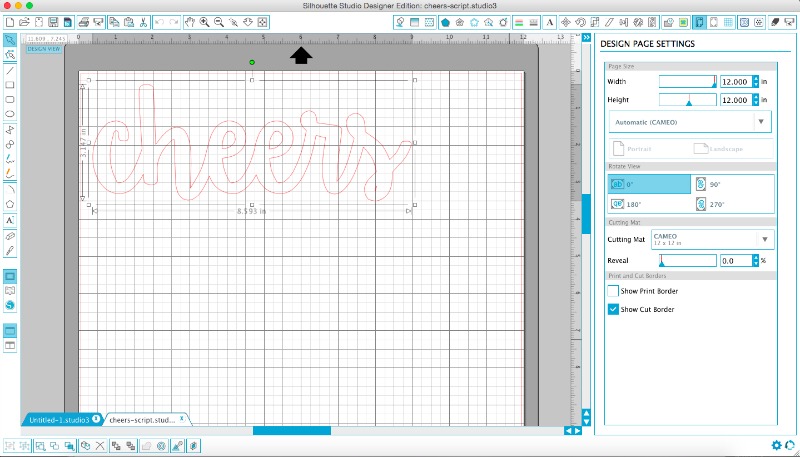
2.) Design your word or phrase. Choose a font and type out your word of choice in Silhouette Studio. Size as needed to fit your tray. I used a font called Daydreamer, welded it together, then thickened it a bit so it would be nice and bold on my tray.
3.) Cut and weed work on adhesive-backed vinyl. Add a piece of vinyl to a cutting mat, load it into your Silhouette and watch that machine do it’s magic! Once cut, weed out the pieces of the letters you won’t need, like the middles of the “e”s. (I used the cut settings recommended for Silhouette vinyl).
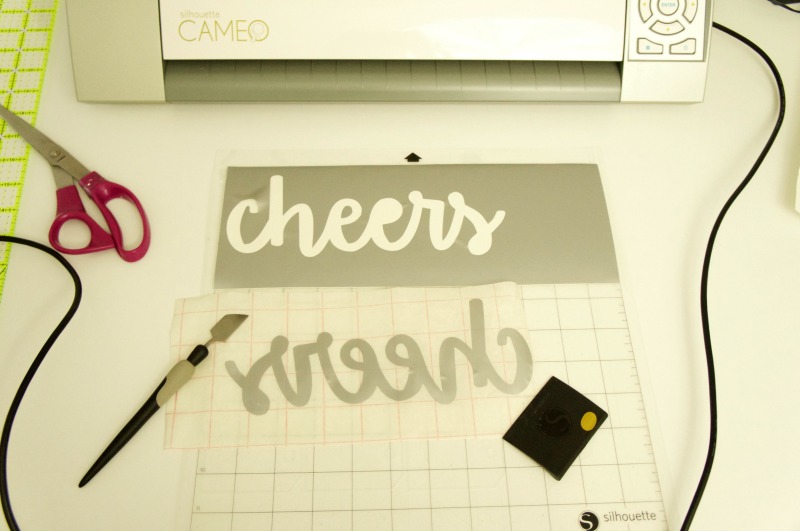
4.) Pick up word using transfer paper and add it to the tray. Be sure to use the Silhouette scraper tool or the edge of a ruler or credit card to smooth the transfer paper over the word. You don’t want any bubbles! Carefully peel the vinyl away from its backing sheet and center it on your tray. Apply it to the tray, smoothing out each letter with the scraper to be sure it adheres fully, then slowly peel away the transfer paper.

5.) Add drinking glasses and accessories. Style your DIY bar tray, add your liquor of choice and you’re ready for happy hour!
Sharing with: Moonlight & Mason Jars
Silhouette Creators Monthly Challenge

Farmhouse Kitchen Canister DIY – Houseful of Handmade
DIY Bar Tray – Two Purple Couches
Rachel Teodoro – Making a New Crate Look Vintage + Using a Stencil Made from Vinyl
My Life from Home – Farmhouse Glass Kitchen Sign
Knock it off Kim – Pantry Refresh and Organization
Michelle James Designs – Cool Clock Update
Simply {Darr}ling – Upcycled Painted Globe: Adventure Awaits
Pocketful of Posies – DIY Dry Erase Calendar

Too cute! What a great way to jazz that old tray up again.
Thanks Rachel!
OMG that tray before was quite something! You did a great job transforming it into something fun and pretty. Nice job! Do you like the transfer paper? I have never used it. I usually just “eyeball” it.
Thanks Michelle! I do like using the transfer paper; I worry less about screwing up my decal! I know it can be a little pricey, but I don’t use it too often.
I can’t believe what that tray looked like before. So much better! Great job. Cheers!
Amy @ my life from home recently posted…Farmhouse Glass Kitchen Sign
Thanks Amy!
Emily,
Your little bar tray is so cute! It was the perfect upcycle! Thanks for joining in on this awesome challenge! Pinning!!
Thank you Cat! And thanks for organizing this challenge – I am looking forward to the next one already!
You had me at bar tray, ha! Love the simplicity and color to it! My liquor of choice is vodka or whiskey, btw! 😉
Haha! Thanks Megan! Vodka & whiskey are both solid choices 😉
You can never have too many trays! I love how this one turned out.
Kati recently posted…3D Heart Valentine
I agree! Thanks Kati!