The hubs and I snuck in one last DIY before 2015 ended—a giant chalkboard for our kitchen wall. But with all the holiday hustle, I haven’t had a chance to share it with you until now! So, without further delay, here is our full step-by-step tutorial on how to build a chalkboard.
What you’ll need:
- 1/8″ fiberboard
- chalkboard paint
- crown moulding
- 1.5″x0.75″ piece of wood (to make ledge for bottom)
- 1/2″ round or similar piece (to make ledge for bottom)
- keyhole hangers
- 3M picture hanging strip
How to build a chalkboard:
The hubs was pretty excited about this project, so I let him take the reins (my job was to add the decorative lettering once it was completed). But I did jump in to take some photos and jot down some step-by-step instructions 😉
Start by selecting a size for your chalkboard and cutting the fiberboard down to those dimensions. Ours measures 42″ long x 36″ wide.
Paint the fiberboard with two coats of chalkboard paint. The hubs used a small foam roller instead of a brush to get a really smooth application.

While the paint was drying, he cut crown moulding for the sides and top of the chalkboard, mitering the edges at a 45-degree angle. (ps – apologies for the grainy basement pictures!)
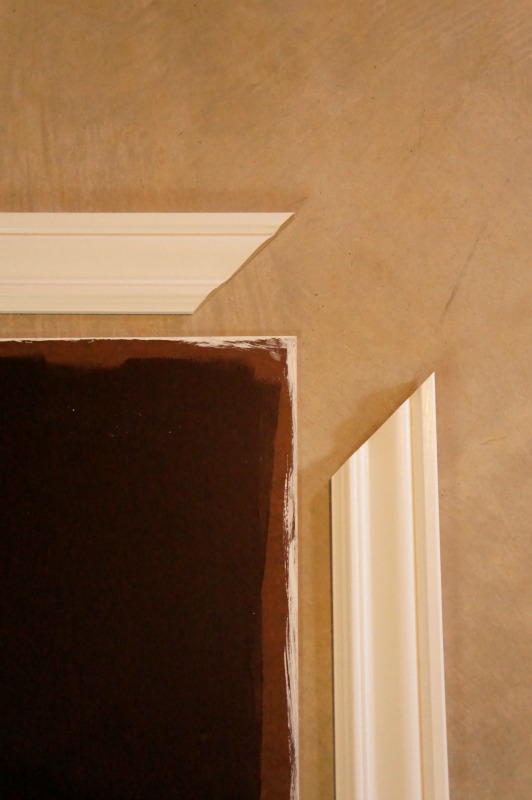
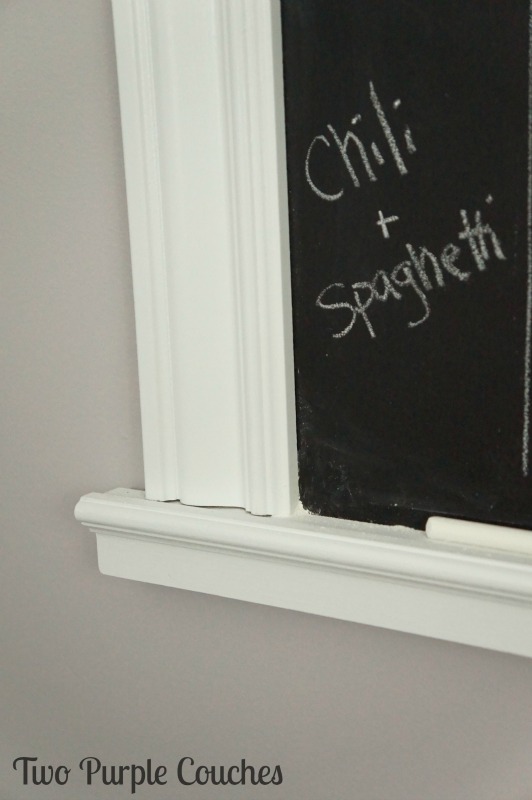
We decided to use different trim on the bottom and create a small ledge so we’d have someplace to stash pieces of chalk. This is where the 1.5″x0.75″ board and the 1/2″ round trim piece came into play. We glued the 1/2″ round trim to the board, offsetting it slightly so that the chalk won’t roll off:

To attach the moulding, the hubs screwed it on from the back of the fiberboard, so there wouldn’t be any holes to putty. Then all of the trim got a coat of paint and once it was dry, it was ready to hang.
This particular chalkboard is h-e-a-v-y, so we attached keyhole hangers to the back of the board and made sure to find studs and use wall anchors. Once we got it hung on the wall, we were having issues with the bottom of the chalkboard bowing out. One 3M picture hanging strip in the center solved this problem!
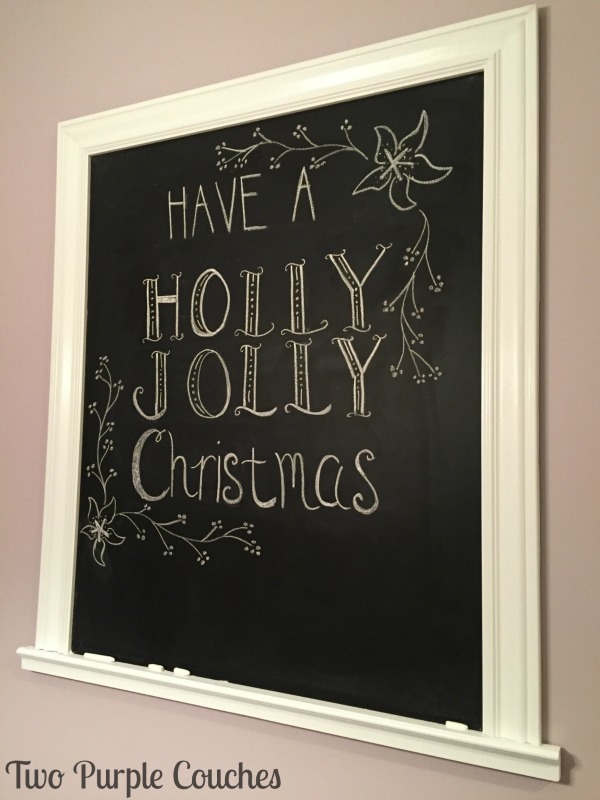
This wall in our kitchen previously held a large canvas printed with a purple flower, but both the hubs and I were getting bored with it. He’s the one who suggested a chalkboard, and I happily agreed. It was perfect timing, too, because I received Valerie McKeehan’s The Complete Book of Chalk Lettering several months ago and have been wanting a larger chalkboard to practice my lettering skills. I had the perfect surface to practice some fancy Christmas designs on:
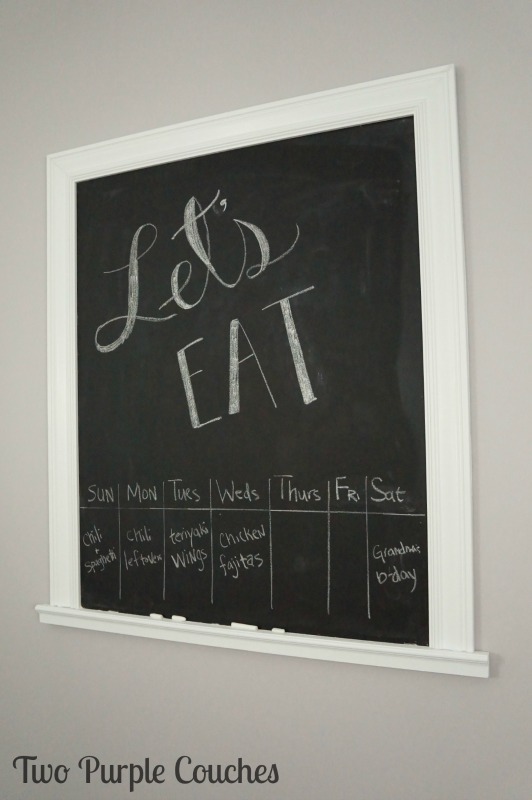
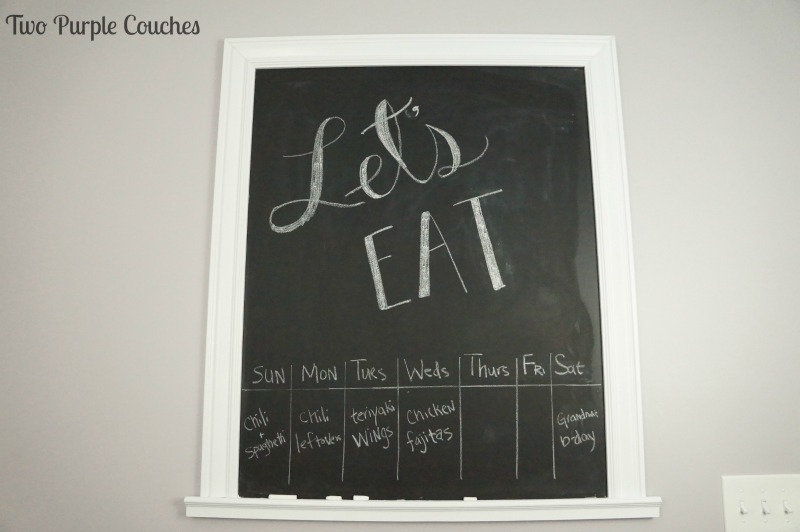
Now that the holidays are over, we’re going to try out using the chalkboard as a menu planning system. I’m hoping we can keep it up throughout the year!
Given the large size of this chalkboard, there is plenty of room for a weekly menu planner or even to draw out a month-long calendar and still have room for a fun message at the top.
The ledge at the bottom is working out quite nicely, too. It’s just wide enough for a piece or two of chalk. And it also helps to catch a lot of the chalk dust. I’d say that’s the only downside so far is all of the dust created from erasing and re-writing on the board. But a damp paper towel (or the vacuum!) quickly cleans up the dust.
So the funny thing about these photos is that our kitchen wall is painted a light lavender color, but it often comes across as gray. Which is apparently happening here, and also giving the impression that I took these photos in black and white 😛
Well, there you have it! That’s our tutorial on how to build a chalkboard! Kudos to the hubs for making this one for me – thanks honey!
Sharing with: Weekend Retreat
Pingback: 53 Gorgeous Ways to Dress Your Blank and Boring Walls | Vus Times
Pingback: 53 Gorgeous Ways to Dress Your Blank and Boring Walls - Day Trader Site
Pingback: 53 Gorgeous Ways to Dress Your Blank and Boring Walls – Jody Minns's Notes
Pingback: 53 Gorgeous Ways To Dress Your Blank And Boring Walls -