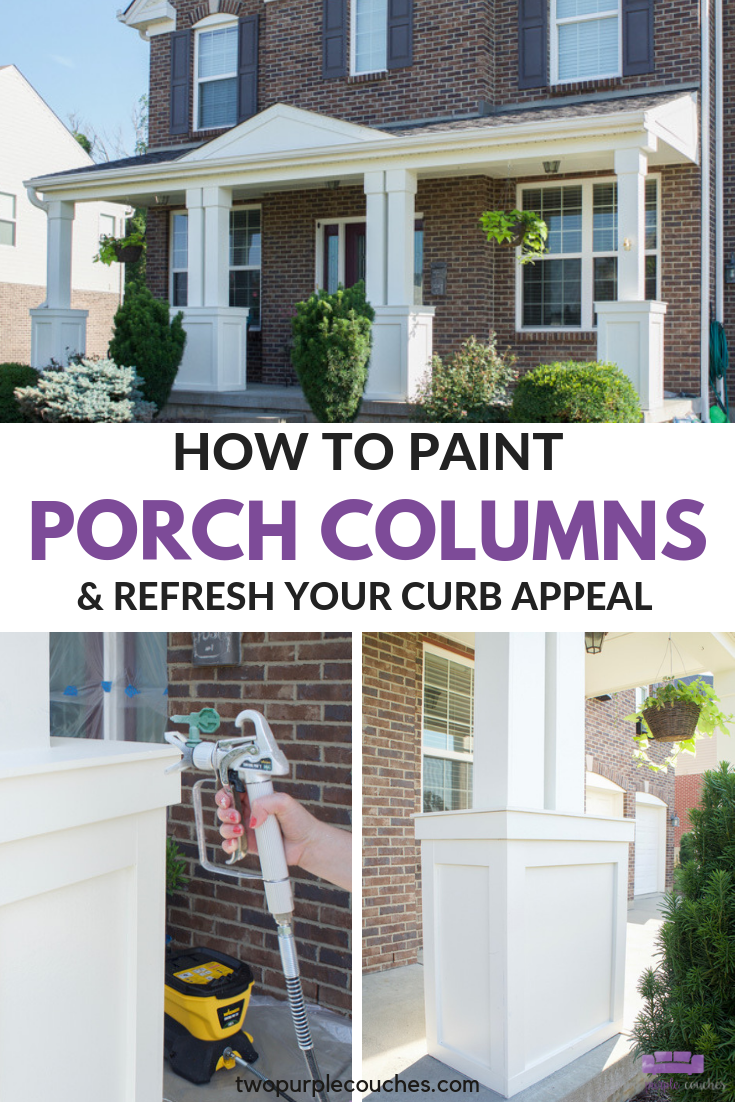
Paint porch columns in less time with a paint sprayer. Learn how to refresh your home’s exterior and curb appeal with this DIY tutorial.

Learn how to paint porch columns and refresh the look of your home’s exterior. Whether you need to paint porch columns for routine maintenance or want to give your home an updated look, using a paint sprayer for the job is vital!
Thank you to Wagner SprayTech for sponsoring this post. All content and opinions expressed here are my own. Click here to read my full disclosure policy.
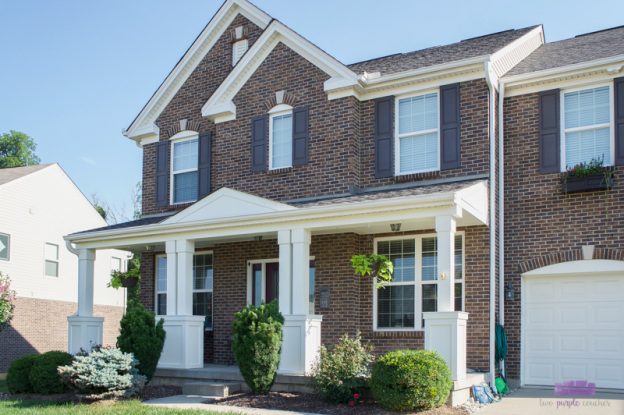
We’ve been needing to paint our porch columns for—ahem—a few years now. But just thinking about all the work involved in this project—from scraping away old paint to re-caulking all the seams—made us feel completely overwhelmed. So it kept getting pushed to the bottom (and I mean the verrrry bottom) of our to-do list.
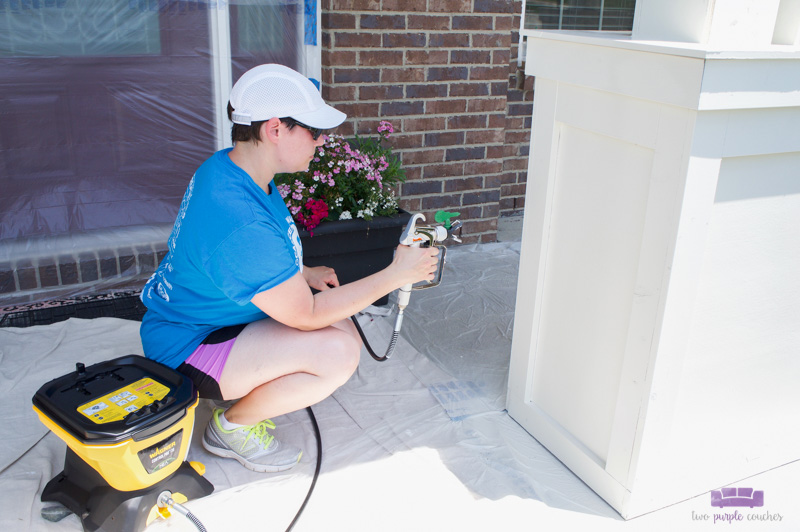
When Wagner asked if I’d like to try out their new Control Pro 130 sprayer, I thought it might be a good tool to help us get the job done.
The Control Pro 130 is a little different from the other Wagner sprayers I’ve used in that it’s a High Efficiency Airless sprayer with a separate tank to hold the paint. The airless technology creates a wide, soft fan pattern on the surface, so you get a really smooth and consistent finish. It feels like a professional grade product. The separate tank holds a lot of paint (1.5 gallons, to be exact), so you don’t have to keep stopping for refills.
I’ve gotten pretty comfortable with my other Wagner paint sprayers (like the FLEXiO 5000), but I’ll admit, the Control Pro 130 was a bit intimidating at first. It’s similar to an air compressor in that it creates pressurized air to power the sprayer. So, this machine means business! I read through the included instruction manual several times, plus watched all of the videos on the Wagner website, to be sure I was very clear on how to set up, operate, and clean up this sprayer before I got to work painting our porch columns. I was extra careful to follow all of the safety instructions and made sure to grab a pair of safety glasses. (Also, wear actual shoes! No flip flops allowed while using this sprayer!)
This post contains some affiliate links for your convenience. Click here to read my full disclosure policy.
How to Paint Porch Columns with a Paint Sprayer
Materials Needed:
- Control Pro 130
- PaintEATER or palm sander*
- Outdoor caulk
- I used DAP DynaFlex Ultra; it comes in a variety of colors, so be sure to get one that matches your paint/surface.
- Masking film
- Painter’s tape (this or this)
- Spackle
- Putty knife
- Paint
- We really like PPG Regency paint+ primer. For this project, we chose Regency Exterior. The color is called “Linen” and it was a custom-mixed for our builder.
- Paint stir stick
- Extension cord
- Ladder
- Safety glasses
- Drop cloths
- Large piece of cardboard (optional; to help shield plants, etc, from overspray)
Tutorial:
Prep
Prep wood columns by cutting out old caulking and scraping away any loose paint and dirt with a putty knife. *The Wagner PaintEATER or a palm sander is great for removing several layers of paint and smoothing rough spots. This is the first time our porch columns have been repainted since they were built, so I only needed to use a medium-to-fine grit sandpaper in a few places.
This is how our porch columns looked before I started scraping away loose paint and patching holes: (yikes, right!?)
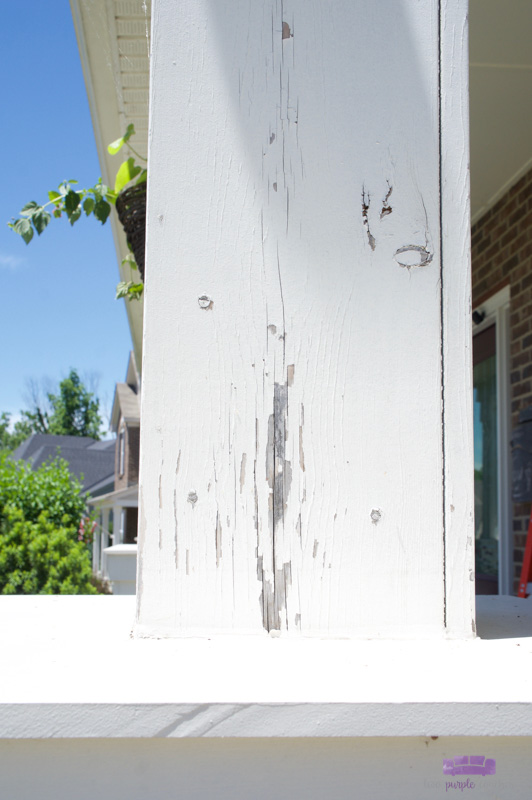
Patch any holes or gouges with spackle. Go over these spots with fine-grit sandpaper once the spackle is dry. Caulk all of the seams with new caulk. Then wipe down columns to remove remaining dirt and sanding dust.
Protect
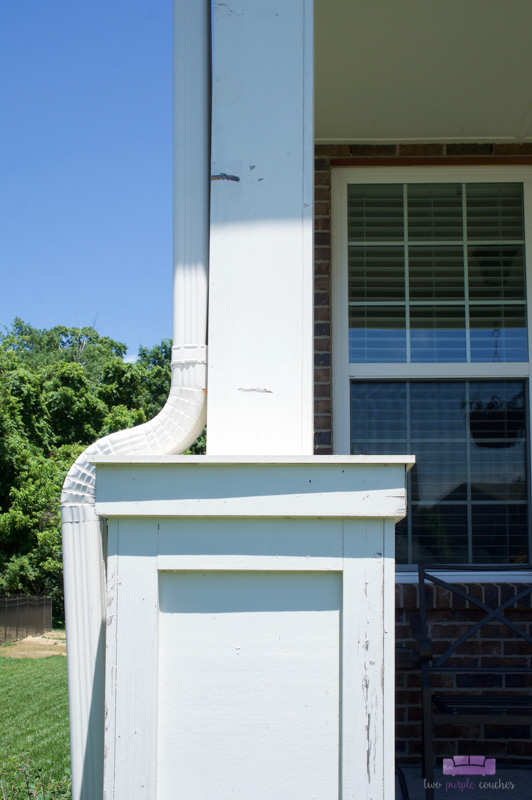
Protect anything you don’t want to get paint on, such as windows, doors, the porch floor, etc, by covering it with painter’s tape and masking film. We cleared our porch of furniture and planters and used drop cloths to cover our landscaping. Tom held up a large piece of cardboard like a shield while I was painting to help protect against overspray.
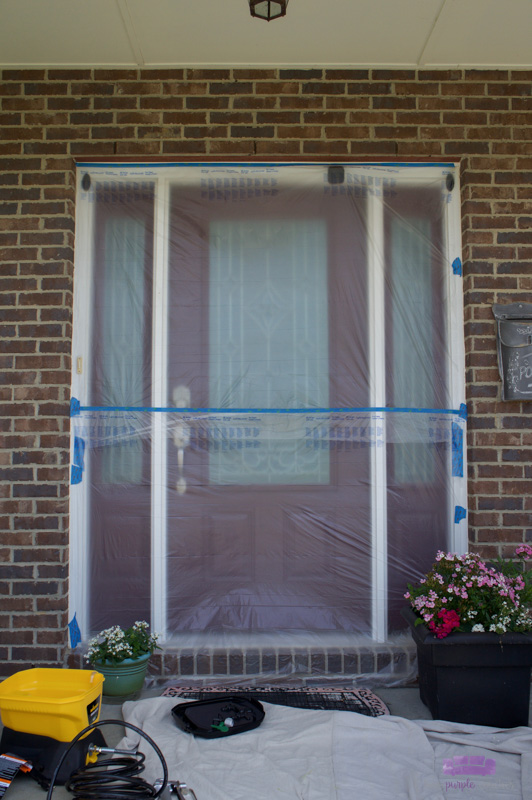

The Control Pro 130 produces less overspray than traditional airless sprayers, but you will still have some. Securing masking film and drop cloths with painter’s tape will help keep ends from flying up while you’re working.
Paint
Prime sprayer with water according to the manual instructions. Then fill the tank with paint, practice on a piece of scrap wood, and you’re ready to go!
Like with any other paint sprayer, you want to overlap your passes to ensure an even coat is applied. Work about 10 to 12 inches from the surface you are spraying.

The fan pattern on the Control Pro 130 is pretty wide, and you can work side-to-side or up-and-down. I was able to paint our porch column bases in just four passes!
Cleanup
The cleanup for this sprayer is more involved than with the other Wagner sprayers I’ve used. The manual says to allow 20 minutes for cleanup, but the first day we worked with this sprayer, it took us over an hour to clean. There are several steps needed to completely clear the tank and flush the hose/nozzle, and these will be repeated multiple times. But the good news is that the more you use this sprayer, the quicker the cleanup will go as you become familiar with the steps.
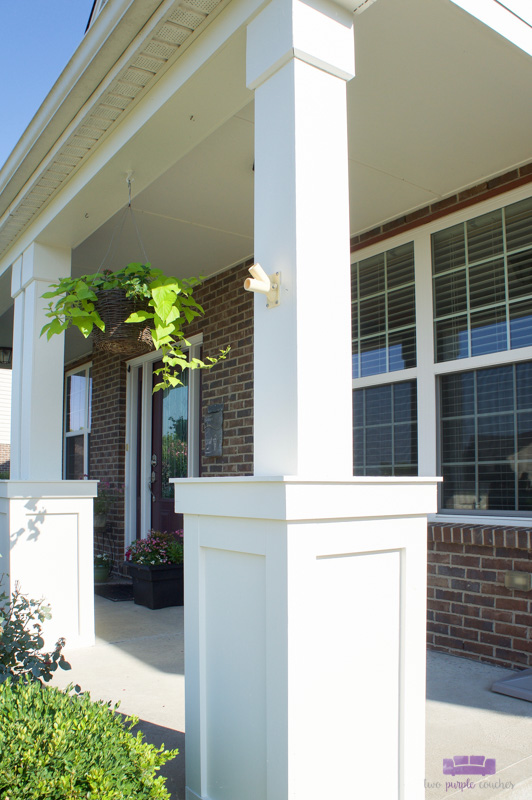
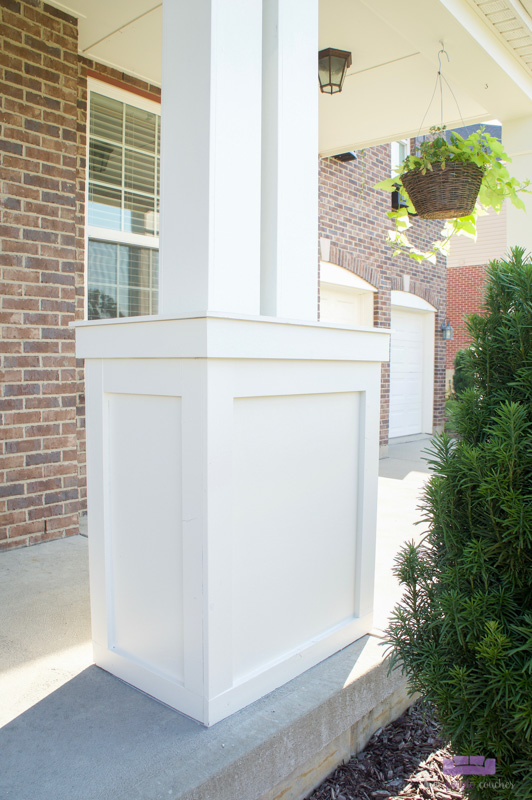
For as much as I was overwhelmed by this project, I am also that glad to have it finished! If you’re anything like us, the “home maintenance” projects are the least fun to do. With a room update or makeover, you get to bring a special vision to life. Maintenance projects are necessary, but don’t always come with a “pretty” reward. Completing this project, though, felt SO good. And I’m glad we won’t have to paint porch columns again anytime soon!
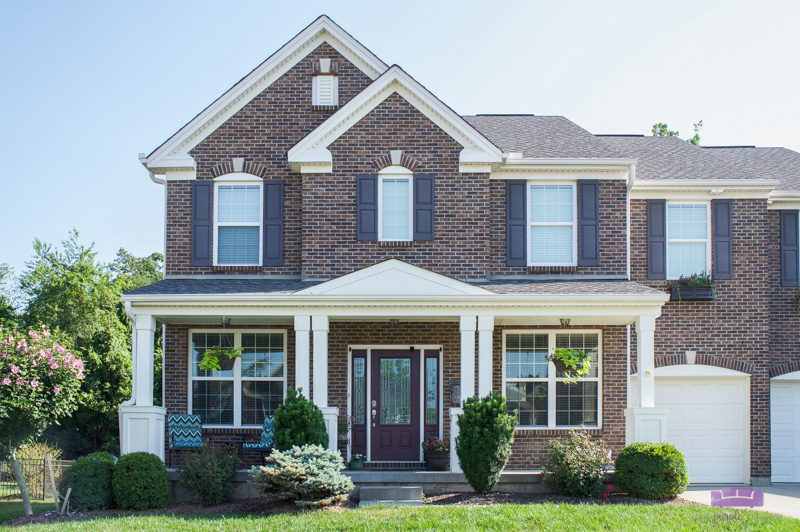
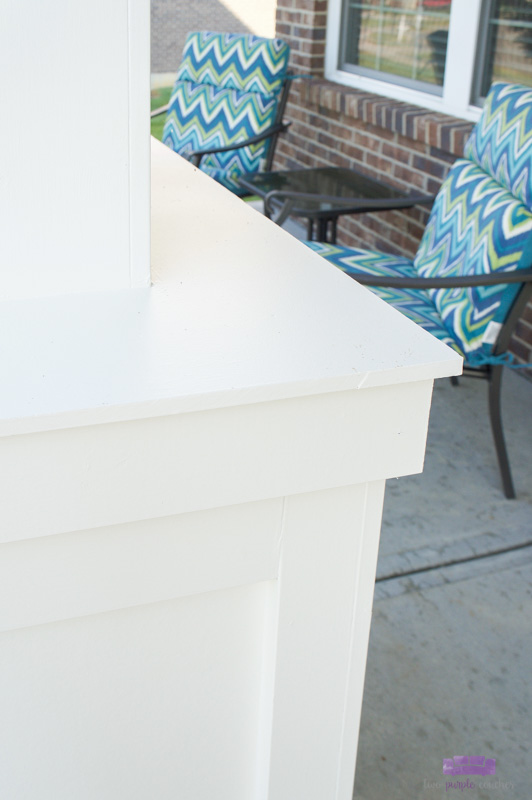
I was embarrassed by how bad the columns looked up close before. The dingy paint wasn’t quite as noticeable from the street, but I always cringed when people came up onto the porch. Now the columns look brand new and our exterior feels more polished.
Tips for using the Control Pro 130
Keep the tank on level ground while you’re working. If it’s sitting in a grassy area, you might try putting a piece of plywood or sturdy cardboard underneath it. Try not to move it around too much while you work. The hose is 25 feet long, so you can cover a large area pretty easily.
Also, try to keep the tank in the shade. The first day we worked, it was SO hot and humid, which caused a few hiccups with the air pressure and with paint drying really quickly on the spray nozzle.
If the nozzle gets clogged, or if paint starts coming out in a stream instead of a spray, try clearing the spray tip. To do this, lock the gun, rotate the green spray tip 180 degrees, and make sure the knob is set to SPRAY. Point the gun at a piece of scrap wood or cardboard, then unlock the gun and squeeze the trigger until paint comes out in a high pressure stream. Release the trigger, lock the gun, rotate the green tip forward to the spray position, and resume painting your surface (You can find this info on page 11 of the manual).
Love this? Pin or Bookmark this post for later!
The porch columns look so good now!! It’s always good to get big projects like this checked off the list!
Thank you, Meg! It felt SO GOOD to cross this project off the list, haha!