
Diamonds may be a girl’s best friend, but gold gems are a close second in my book! These DIY gem magnets definitely add a dose of glam to any fridge or memo board, and are a simple project you can make with clay from the craft store.
If you’ve seen my recent craft room makeover (you haven’t seen it yet!? check it out here), you probably noticed the framed magnetic board hung behind my work table. Well, once I had the board finished, I realized I didn’t have any magnets for it! So I started rummaging through my craft supplies and brainstorming ideas for DIY magnets. I came across a package of clay I’ve been slowly working my way through, and knew I wanted to use it to craft the magnets.
But what could I make with it? I figured I could just roll it out and use a cookie cutter to make some circles to paint, but that’s kind of boring. And that’s when I was reminded of a pair of gold faceted gem earrings that I wear all the time and absolutely love. And the idea for these DIY gem magnets was born!
This post contains some affiliate links for your convenience. Click here to read my full disclosure policy.
How to make DIY Clay Gem Magnets
Materials Needed:
- La Doll Premier Air Dry Clay
- Gold acrylic craft paint
- Small paint brush
- Disc magnets
- (3/4″ diameter is what I used)
- Craft Blade or X-ACTO Knife
Tutorial:
I am no master of clay, but thankfully a project like this doesn’t require a lot of molding skills!
1.) First, take a small amount of the La Doll Clay and mold it into a cube shape. If the clay feels a bit dry, add a few drops of water or wet your fingers and continue working it until it’s the right consistency. Also, your cube shape doesn’t have to be perfect – these gems should have a perfectly imperfect feel.
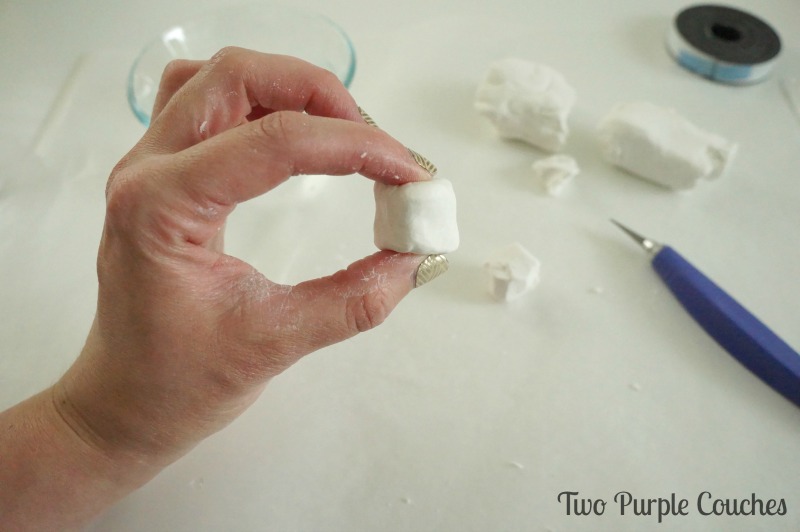
2.) Take your craft or X-ACTO knife and start cutting away chunks of the cube. I started at one of the corners and carefully cut off small sections, working my way around the cube. This gives your gem that faceted look.

3.) Set your clay gems on a piece of wax paper and allow to dry overnight, or per the instructions on your clay. Once dry, paint gems with gold acrylic craft paint. I think mine needed 2-3 coats of paint.

4.) Use hot glue to adhere one magnet to the back of each gem. Tip: I found it easier to designate a “back” for each gem while I was molding and cutting them. That way I knew the magnet would fit on one side – does that make sense? Also, you may have noticed a roll of magnetic tape in the photo above; initially I planned to use this, but 1) it wouldn’t stick to the gems and 2) it would barely hold a scrap of copy paper on my magnetic board! So I had to hunt down some disc magnets instead.
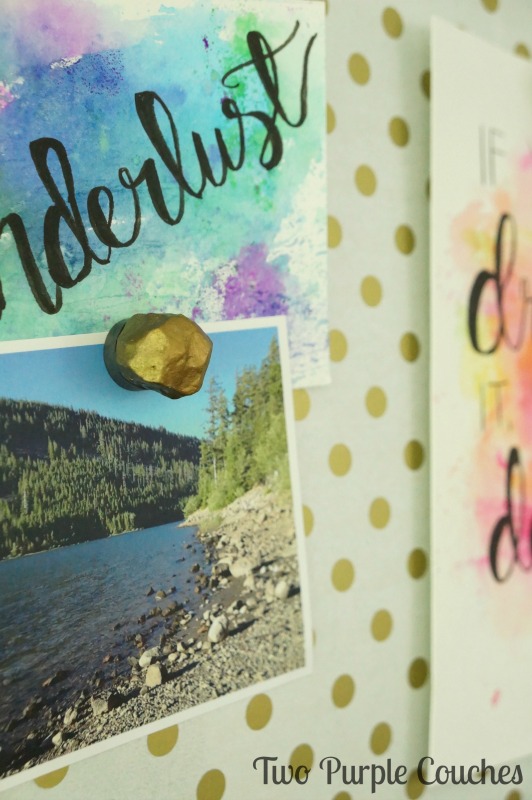
I think these DIY gem magnets turned out so cool, and they pair perfectly with the gold polka-dotted paper on my magnetic memo board! It adds a fun glam touch to my craft room, but I really love that I have an easy way to display my latest doodles and other small prints, photos—anything that’s inspiring me lately!
Love this? Check out more easy clay projects:
I love when you can use something you already have to make something great! Feel like ya did for free! Great job on the magnets. Sharing on Twitter #merrymonday
Kim
Me too, Kim! Thanks!